Spring vegetable pot pie offers both convenience and elegant presentation. This one-pan wonder takes just 1 hour and 15 minutes to prepare, making it perfect for casual weeknight dinners or special occasions.
The dish bursts with vibrant seasonal vegetables like fennel, leeks, asparagus, and carrots nestled in a flaky puff pastry crust. Fresh herbs blend into the creamy sauce and transform simple ingredients into a satisfying meal that feeds 8 people.
This piece will teach you everything about achieving a perfect crust. You’ll discover the science behind flaky layers and proper equipment selection. The step-by-step assembly methods will give you the confidence to create consistent results, even as a pot pie beginner.
The Science Behind a Perfect Pot Pie Crust
The crust makes or breaks a spring vegetable pot pie. That flaky, golden exterior isn’t just pretty – it’s pure science that balances texture, structure, and flavor. The science behind it can turn your pot pie from good to extraordinary.
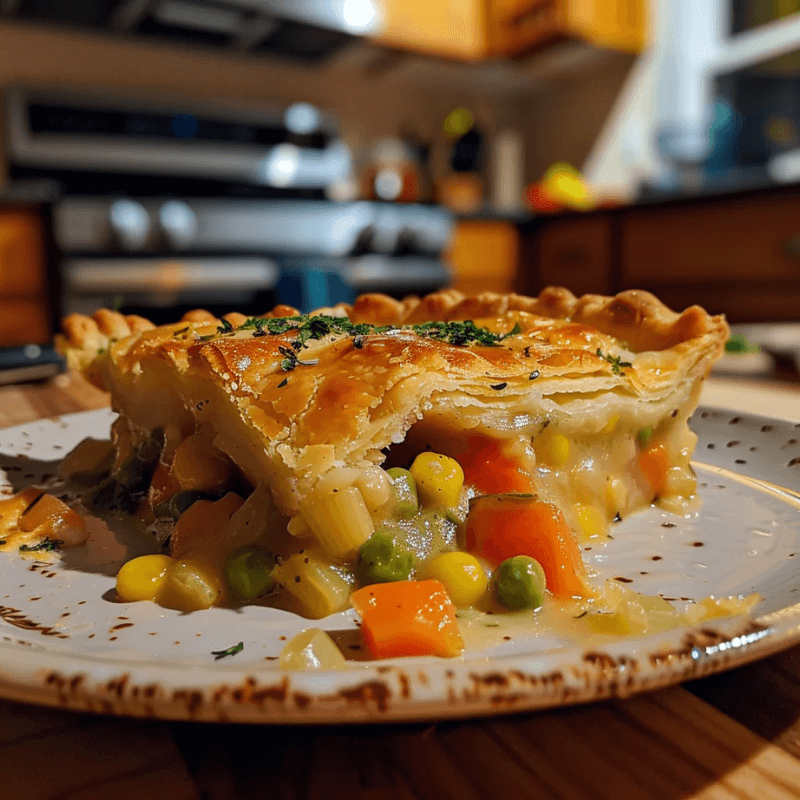
Spring Vegetable Pot Pie – fresh, warm, and homemade.
Understanding different crust options
Every pot pie crust starts with basic ingredients: flour, fat, salt, and water. The type of fat you pick makes a big difference in your final result.
Butter gives you the tastiest crust with distinct flaky layers. These layers form because butter contains water that turns to steam during baking. This steam creates pockets that separate the dough into layers. Butter melts quickly and needs careful handling, but nothing beats its rich flavor.
Shortening works better for structure because it melts at higher temperatures. You can work with it longer without it melting under your fingers, and it helps crusts keep their shape while baking. The trade-off? It lacks butter’s amazing flavor and creates a different flakiness.
Lard makes a super crisp, flaky texture and stays solid longer than butter in heat. It’s not as tasty as butter but beats shortening in flavor.
Many bakers like to mix fats. Using butter and shortening together gives you butter’s great taste and shortening’s stability – some bakers call this mix their “shape insurance.” This blend creates a tender, flaky crust that’s easier to handle than pure butter dough.
Store-bought refrigerated crusts or puff pastry work great if you’re short on time. “If you happen to have some extra puff pastry in the freezer, it also makes a great pot pie crust,” says one cooking expert.
Why temperature matters for flakiness
Temperature can make or break your flaky pot pie crust. Cold ingredients aren’t optional – they’re the key to success.
Cold butter creates flakiness. Solid chunks of cold butter in your dough create separate layers. These butter pieces melt in the hot oven, and their water turns to steam. This steam leaves tiny air pockets between dough layers, giving you that perfect flaky texture.
Cold ingredients also slow down gluten formation. Warm water and flour create gluten – great for bread but bad for pie crusts. Cool ingredients let you build just enough structure without making the crust tough.
Here’s how to manage temperature for perfect crusts:
- Use butter straight from the fridge (or freeze it briefly)
- Add ice-cold water
- Cool your mixing bowl first
- Work fast in warm kitchens
- Chill dough if it feels soft or sticky
- Let the assembled dough chill 30 minutes before rolling
- Rest the finished dough 30 minutes to 2 hours before baking
Your handling technique matters too. One pastry expert explains, “When making pie dough, butter is cut into the flour in small pieces; although they don’t coat all the flour particles like softened butter would, these pieces are small enough to still coat some of it.” This butter coating blocks too much gluten from forming, keeping your crust tender.
The role of fat in your crust
Fat does more than add flavor to your pot pie crust:
Fat creates tenderness by coating flour particles. This coating keeps flour from soaking up too much liquid and stops gluten from overdeveloping. You get that perfect melt-in-your-mouth texture.
Fat builds structure through its melting patterns. Butter melts fast in the oven, creating those distinct flaky layers. Shortening melts slower, helping the crust stay shaped while baking.
Fat helps with rising as it melts. Steam from butter’s moisture makes gaps between dough layers grow, lifting your crust. This lift matters most for your pot pie’s top crust.
The size of your fat pieces changes everything. You want different-sized butter chunks in your dough. These varied butter pockets create your crust’s flakiness. Hot oven air hits these pockets, making them steam and puff up the dough.
Pot pies need slightly stronger crusts than dessert pies. One baker points out, “The pot pie crust is designed to complement savory fillings and provide a hearty, satisfying experience, whereas dessert pie crusts focus on sweetness and delicacy.” A mix of fats works best – butter for taste, shortening for structure.
Baking needs exact measurements and temperatures to succeed. Small changes can affect your results greatly. These basic principles will help you make a pot pie that shows off your spring vegetables perfectly – wrapped in golden, flaky pastry that’s both tender and strong.
Essential Equipment for Foolproof Results
Your spring vegetable pot pie will turn out great when you have the right tools. The equipment you pick plays a vital role in getting that perfect golden crust and evenly cooked filling. Let me share the gear that will make your pot pie experience easier and better.
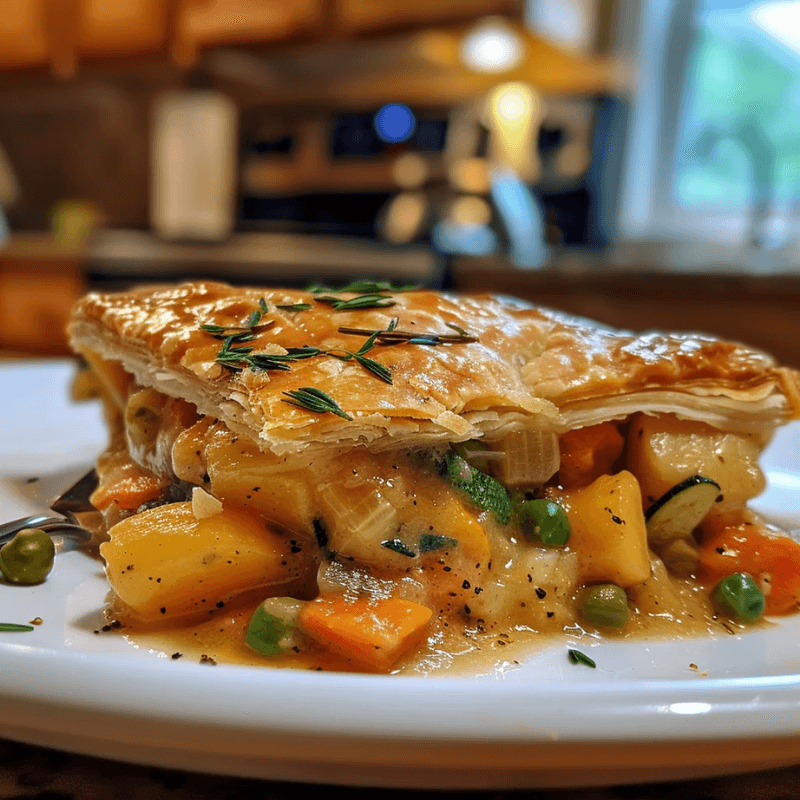
Enjoy a warm Spring Vegetable Pot Pie with seasonal veggies
Choosing the right baking dish
The baking dish you pick can really affect how your spring vegetable pot pie turns out. Different materials conduct heat in unique ways that change both cooking time and crust texture.
Glass pie dishes heat slowly and spread heat evenly. They work great for beginners. The steady heat cooks the whole pie uniformly – bottom crust, filling, and edges. These dishes are also see-through, so you can check when the bottom crust browns properly. This helps a lot with dishes that need longer baking times.
Ceramic dishes give you many of the same benefits as glass but look much nicer. You’ll find them in many more colors and designs. These dishes look beautiful when you bring your spring vegetable pot pie straight to the table. The only catch is they heat more slowly, so your pot pie might need extra time in the oven.
Metal pans, especially aluminum ones, conduct heat better than other materials. Your pot pie will cook faster and get crisp, well-browned crusts. A quality metal pan often fixes the biggest problem of “soggy bottoms”. Aluminum pans are also lighter and easier to handle.
Small ceramic ramekins (around 5 inches) work great to make individual spring vegetable pot pies. These create an impressive look at the dinner table.
Most pie dishes come in 8 to 10-inch sizes. A 9-inch dish works best for most recipes. Look for dishes between 1.5 and 2 inches deep – this gives enough room for filling and crust.
Must-have tools for perfect crusts
Rolling pins help you get an even crust thickness. Wooden pins are great because dough doesn’t stick to them and they give you good control. French-style tapered pins make it easy to roll circular crusts, while straight dowel pins help keep the thickness even.
A pastry cutter helps mix fat into flour without overworking the dough. This simple tool cuts butter into small, even pieces that create flaky layers in your pot pie crust. A stand mixer with a paddle attachment can be a lifesaver if you make big batches or have trouble mixing by hand.
Pastry brushes do more than just put egg wash on your pot pie crust. The egg wash seals the dough and creates that beautiful golden shine that makes spring vegetable pot pies look so good. Silicone brushes are easy to clean in the dishwasher.
Your pot pie needs a pie crust shield. This tool keeps the outer crust from getting too brown while the center keeps cooking. You can buy one or make it from aluminum foil.
Pie weights keep bubbles away and help maintain shape during pre-baking. About 1.5-2.5 pounds of ceramic weights hold your crust in place. This stops it from puffing up and taking space meant for your spring vegetable filling.
Silicone baking mats give you a non-stick surface for rolling dough. Many mats come with printed guides to help you roll the right size. They also keep your counter clean.
A digital food scale might not seem important at first. But weighing ingredients gives you better results than measuring by volume.
These tools will set you up to make amazing spring vegetable pot pies. Good equipment makes cooking more fun and helps you get picture-perfect results every time you bake.
Step-by-Step Spring Vegetable Pot Pie Assembly
Making a spring vegetable pot pie takes patience and skill to get that perfect mix of flaky crust and tasty filling. It’s just like building a house – you need to pay close attention to each layer. Here’s how to break down the process into simple steps that will give a great result every time.
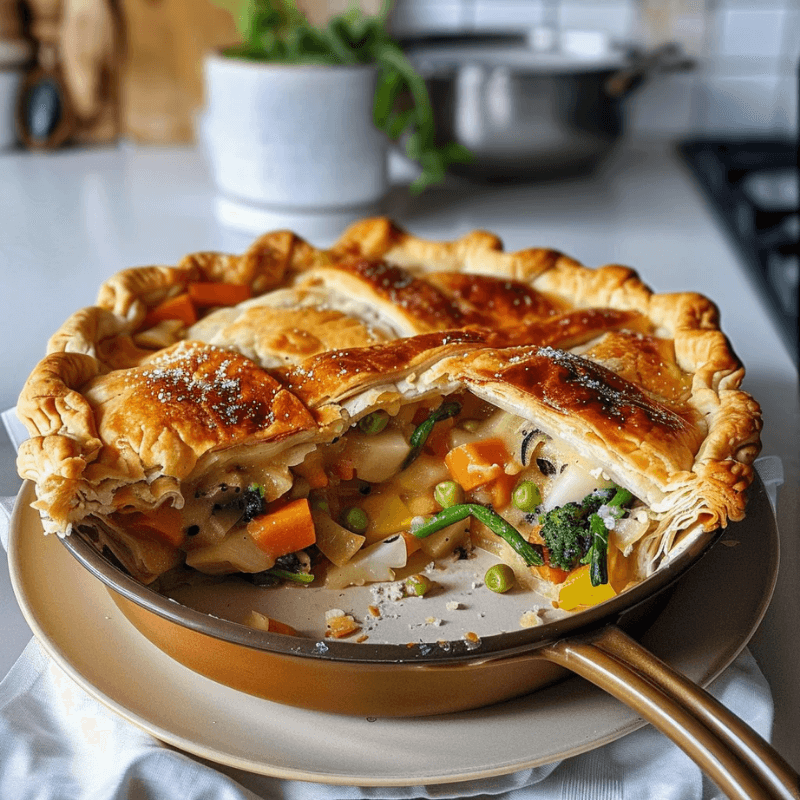
Homemade Spring Vegetable Pot Pie – light, flaky, and satisfying
Preparing your vegetables properly
The secret to an amazing spring vegetable pot pie starts with how you handle the main ingredients. The way you prep your veggies will affect your final dish:
First, dice all vegetables uniformly – you’ll want pieces about ½-inch in size. This helps everything cook evenly and stops some veggies from turning mushy while others stay hard. This is especially important with root vegetables like carrots and potatoes.
Here’s how to prep your spring vegetables:
- Par-cook root vegetables first by simmering them in vegetable broth for about 15 minutes or roast them to bring out deeper flavors.
- Add delicate spring vegetables like peas near the end – they cook quickly and this keeps their bright green color.
- Sauté onions and mushrooms in butter until they’re golden to develop rich flavors before mixing them into your filling.
Spring vegetables like asparagus, fennel, and young carrots work well with a quick blanch instead of full cooking. This keeps their fresh taste and stops them from falling apart during baking.
Creating the perfect filling consistency
Your pot pie filling should be creamy and thick – not watery or stiff. Think of it like cream soup that’s been reduced by half.
Here’s how to nail that perfect consistency:
- Start with a roux (equal parts fat and flour cooked together) as your thickener
- Add liquid slowly while whisking to avoid lumps
- Let it simmer until the sauce coats the back of a wooden spoon
Many people end up with filling that’s too runny. Your filling should be a bit thicker than what you want at the end since vegetables release moisture while baking. If it looks too thin, keep simmering until it reduces or mix some cornstarch with cold water to thicken it up.
Let your filling cool completely before adding it to the crust. Hot filling will melt the butter in your crust too early and ruin those flaky layers.
Becoming skilled at the crust-to-filling ratio
Pot pie lovers have long debated the perfect crust-to-filling ratio. Here are some options to think over:
Double-crust pies give you that classic experience with crust all around the filling. Fill these about ¾ full, leaving about ½-inch of space at the top so nothing spills.
Top-crust only versions pack in more filling while giving you that crispy top. Spring vegetable fillings look great this way, and you won’t have to worry about soggy bottoms.
Whatever style you pick, don’t overfill – it makes the pie hard to eat and can cause messy spills during baking. Keep the filling level with or slightly below your dish’s edge before putting on the top crust.
Proper sealing techniques
A well-sealed spring vegetable pot pie keeps the filling in place and helps the crust bake perfectly:
For double-crust pies, brush egg wash on the bottom crust’s edge before adding the top – this creates a natural seal between layers. Then fold the top crust under the bottom to make a thick, raised edge.
You can pinch the raised edge between your thumb and forefinger to make a pretty scalloped pattern. Or just press a fork around the edges for an easier seal.
Remember to cut 3-5 slits in the center of the top crust. This lets steam escape and keeps the top from getting soggy or bubbling over. Brush the top with egg wash (one beaten egg mixed with a tablespoon of milk) to get that beautiful golden shine.
Your pie will turn out better if you chill it in the fridge for 15-20 minutes before baking. This final cold snap helps the crust hold its shape while baking.
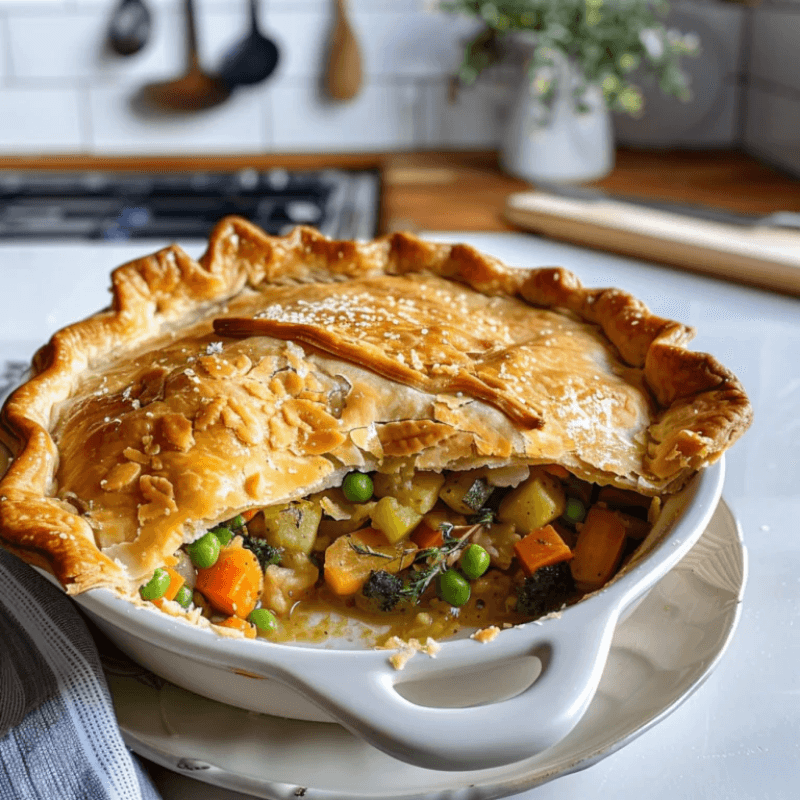
This Spring Vegetable Pot Pie is comfort food at its best
Common
Perfect pot pies can still give home bakers a hard time. Learning to handle these common issues will lift your spring vegetable pot pie from good to extraordinary.
Your filling needs to cool down completely before you start assembly. The butter in your crust will melt too early if the filling is hot, and you’ll end up with a soggy bottom. The quickest way to cool your filling is to spread it on a large plate and put it in the refrigerator. Just stir it now and then until it’s cold.
A baking sheet under your pot pie saves your oven from spills and makes cleanup easier. This simple trick stops any messy situations when the filling bubbles over.
Your crust needs careful attention while baking. The edges often brown faster than the middle, so keep foil strips or a pie shield handy to protect any parts that darken too quickly.
A fully cooked pot pie stays good in the fridge for about 3 days or in the freezer for up to 2 months. If you plan to serve it after three days, it’s better to freeze and defrost it later.
The best way to reheat your pie is at 300°F or lower – anything hotter will burn the crust before the filling gets warm. Frozen pies need about an hour in a regular oven at 300°F. If your pie was in the fridge and has a flaky crust, 10-20 minutes at 325°F works well.
You can use a microwave, but your crust might get soggy. Just remember to take it out of any metal tin first.
Steam vents are a vital part of your spring vegetable pot pie. These small cuts let steam escape and help prevent soggy crusts and overflow messes.
That egg wash is a must-do step – it creates the beautiful golden, glossy finish that makes pot pies look so appetizing.
Your patience after baking really pays off. Let the pie sit for 20 minutes before cutting into it. This gives the thickeners time to work their magic. Cut too soon and you’ll have runny filling all over your plate, no matter how careful you were during preparation.
 About HealthyBlog365
Welcome to HealthyBlog365, your go-to destination for all things food and drink. We believe that every meal is not just a way to nourish your body but also a meaningful connection with yourself and your loved ones.
HealthyBlog365 was created with a mission to inspire healthy living through nutritious meals and refreshing beverages. Here, you’ll discover a treasure trove of creative recipes, kitchen tips, and healthy eating trends tailored to fit modern lifestyles.
 What can you find on HealthyBlog365?
- Delicious and easy-to-make recipes: From simple meals for busy mornings to wholesome dinners for family gatherings, we’ve got you covered for every occasion.
- Nutritious drinks: Explore recipes for juices, smoothies, detox teas, and drinks that cleanse your body, boost your mood, and energize your day.
- Guides on eating habits: Get detailed insights into popular diets like keto, low-carb, and vegetarian-friendly meal plans.
- Kitchen hacks: Discover smart tips to save time, preserve food, and cook more efficiently.
We are committed to providing high-quality content, staying up-to-date with the latest trends, and maintaining a balance between nutrition and flavor.
 Connect with HealthyBlog365 on Social Media
Join the HealthyBlog365 community on social media platforms to stay updated with our latest posts, watch exciting tutorials, and share your food stories with us:
 Facebook: Follow us here to stay updated with our latest posts and join our community.
 Instagram: Check us out here for inspiring visuals and ideas.
- Pinterest: Pin with us here to save creative ideas you’ll love.
 YouTube: Subscribe here for detailed tutorials and exciting videos.
 Thank You for Supporting HealthyBlog365!
We aim to build a connected community where everyone can share and learn from each other. If you have any questions or suggestions, don’t hesitate to reach out to us via social media or our website.
We hope you have a wonderful time on HealthyBlog365 and find new inspiration for your healthy culinary journey!

Spring Vegetable Pot Pie
 Prep Time 15 minutes Cook Time 30 minutes Total Time 45 minutes
 Description
Ingredients
- 1 pie crust store-bought or homemade
- 1 cup fresh asparagus chopped
- 1 cup carrots diced
- 1 cup frozen peas
- 2 small Yukon Gold potatoes diced
- 1 medium sweet onion chopped
- 2 cloves garlic minced
- 1 cup low-sodium vegetable broth
- ½ cup heavy cream
- 1 tsp dried thyme
- 1 tsp dried rosemary
- Salt and pepper to taste
Instructions
- Preheat oven to 425°F (220°C) and grease a pie dish.
- In a skillet over medium heat, melt butter and sauté onion and garlic until fragrant.
- Add asparagus, carrots, potatoes, peas, thyme, rosemary, broth, and cream; simmer for about 10 minutes.
- Season with salt and pepper; pour filling into the pie crust.
- Cover with top crust or lattice; seal edges.
- Bake for 25-30 minutes until golden brown.