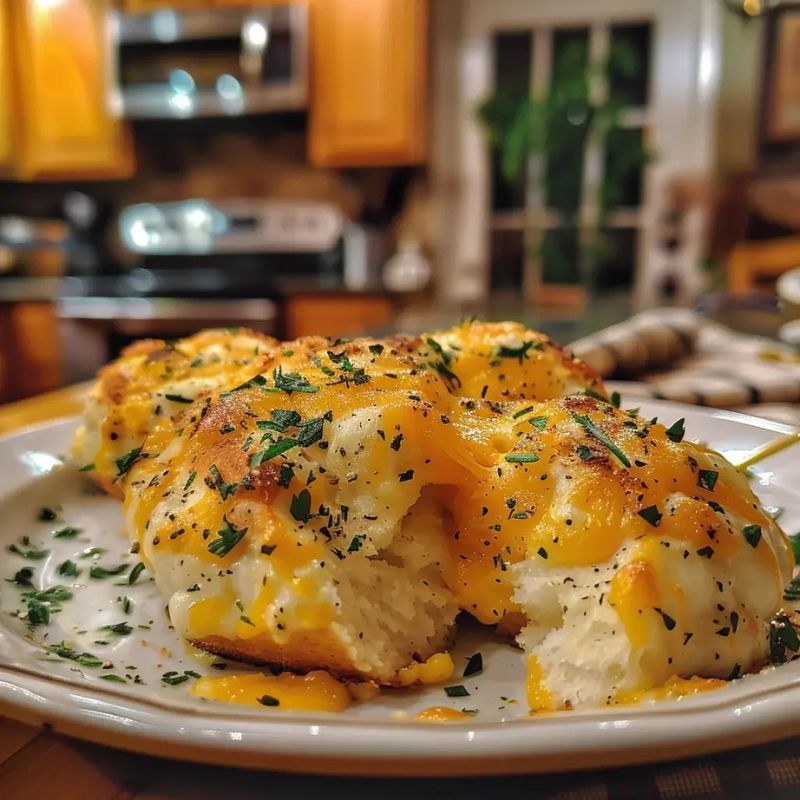
Cheesy Garlic Butter Bombs are like little pillows of joy that explode with flavor in your mouth. Imagine biting into a warm, gooey center filled with the irresistible blend of melted cheese and aromatic garlic, all wrapped up in soft, pillowy dough. Whether you’re serving Cheesy Garlic Butter Bombs at a party or enjoying them on a cozy night in, these delights are guaranteed to elevate any occasion to gourmet status.
I still remember the first time I made Cheesy Garlic Butter Bombs for my family. The moment they took their first bite, their eyes lit up like kids on Christmas morning. We actually ended up fighting over the last one—an epic battle of forks and laughter that turned an ordinary evening into a cherished memory filled with cheesy, garlicky goodness.
Why You’ll Love This Cheesy Garlic Butter Bombs Recipe
-
Cheesy Garlic Butter Bombs are incredibly easy to prepare, making them perfect for beginners and seasoned cooks alike
-
Their flavor profile is a mouthwatering combination of savory garlic, buttery richness, and melty cheese—irresistible to all ages
-
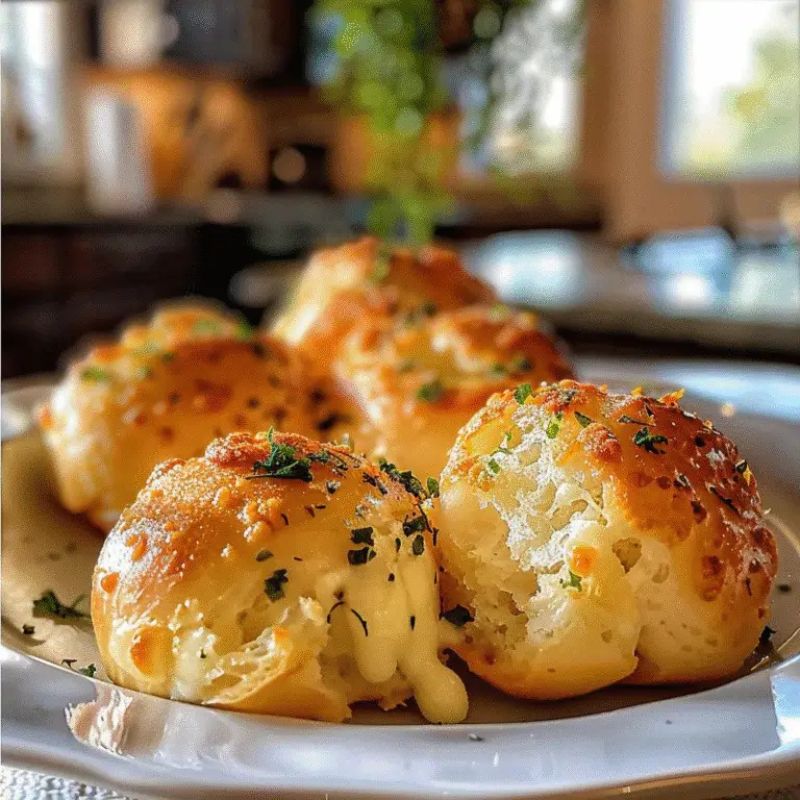
With their golden, crisp exterior and soft interior, Cheesy Garlic Butter Bombs make stunning appetizers or snack bites for any occasion
-
They’re versatile enough to serve as a party starter, savory breakfast, or indulgent side dish for pasta nights
-
Watching my family devour these Cheesy Garlic Butter Bombs was priceless—I could barely keep up with the demand!
🍽️ For more deliciously cheesy ideas, check out our Garlic Parmesan Cheeseburger Bombs recipe too.
🧄 Essential Ingredients for Cheesy Garlic Butter Bombs
To make the ultimate Cheesy Garlic Butter Bombs, you only need a few simple ingredients—but each one plays a key role in creating a gooey, buttery masterpiece. Whether you’re prepping for a family gathering or a casual movie night, this recipe is quick, satisfying, and always a hit.
-
Refrigerated Biscuit Dough: This is your shortcut to buttery, flaky perfection. Choose high-quality flaky biscuit dough, as it bakes up beautifully golden with soft layers that cradle the melty center of your Cheesy Garlic Butter Bombs.
-
Shredded Mozzarella Cheese: Nothing beats the stretch and melt of mozzarella. For best results, go for freshly shredded mozzarella—it’s creamier and melts more evenly than pre-packaged blends.
-
Fresh Garlic: Don’t hold back on garlic! Fresh minced garlic gives your bombs that bold, savory aroma that makes everyone’s mouth water as soon as they hit the oven.
-
Unsalted Butter: Melted butter is brushed over the bombs before baking, infusing them with richness. Using unsalted butter allows you to season to taste without going overboard.
-
Chopped Parsley (optional): A sprinkle of parsley adds a pop of freshness and visual appeal. It balances the richness and makes your Cheesy Garlic Butter Bombs even more irresistible.
📋 You’ll find full measurements and instructions in the printable recipe card below. For more savory snack inspiration, don’t miss our Easy and Delicious Apple Fritters recipe.
👩🍳 Let’s Make Cheesy Garlic Butter Bombs Together
Making Cheesy Garlic Butter Bombs is surprisingly simple—and seriously fun! Here’s how to bring them to life:
1. Preheat Your Oven
Start by preheating your oven to 375°F (190°C). This ensures even baking and gives your biscuit bombs that beautiful golden finish.
2. Prepare Your Biscuits
Open your can of refrigerated biscuit dough and gently separate each biscuit. Be careful not to tear them—you need a full, intact disc of dough for each garlic butter bomb.
3. Add the Filling
Spoon about 1 tablespoon of shredded mozzarella and a pinch of minced garlic into the center of each biscuit round. The more cheese you add, the more melty magic you’ll get in every bite.
4. Seal Them Up
Fold the edges of each biscuit up and over the filling to create a sealed pouch. Pinch the seams tightly to avoid any cheese leaking during baking. It should resemble a little dough ball packed with deliciousness.
5. Melt That Butter!
Melt your unsalted butter in a small bowl. Once melted, stir in any leftover minced garlic and fresh parsley if using. This buttery garlic mix is what transforms these from good to absolutely addictive.
6. Bake to Golden Perfection
Place your sealed Cheesy Garlic Butter Bombs on a parchment-lined baking sheet. Brush the tops generously with your garlic butter mixture, then bake for 12–15 minutes or until the tops are golden, crispy, and your kitchen smells heavenly.
🧈 Savor Every Bite
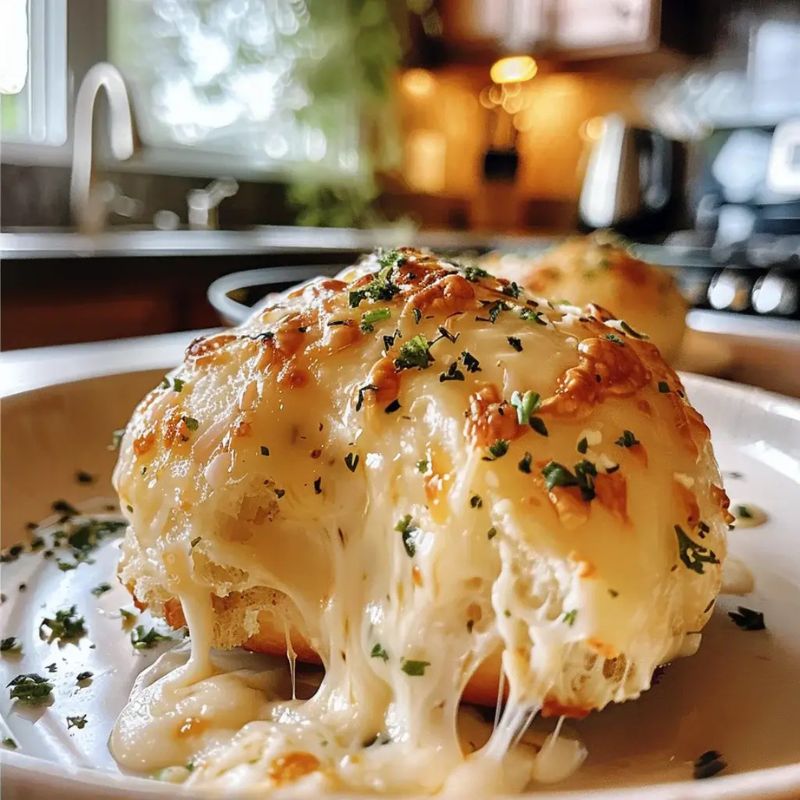
As they come out of the oven, your Cheesy Garlic Butter Bombs will be sizzling and golden—ready to be devoured. Let them cool for just a minute or two before serving. The centers will be molten with cheese, and the outside will be beautifully buttery with hints of garlic and herbs.
💡 You Must Know
-
Cheesy Garlic Butter Bombs are the ultimate indulgence: warm, gooey, and packed with flavor in every bite.
-
Their soft, flaky exterior combined with a cheesy, garlicky center makes them an instant hit at any event—from holiday parties to weekday snacks.
-
Want to level up the experience? Pair them with zesty marinara, ranch dressing, or even garlic aioli for dipping.
-
These are perfect served as party appetizers, side dishes, or even a savory brunch treat with scrambled eggs and fruit.
🔥 Perfecting the Cooking Process for Cheesy Garlic Butter Bombs
Achieving the perfect batch of Cheesy Garlic Butter Bombs comes down to two things: preparation and precision. First, be sure to preheat your oven to 375°F (190°C). A properly heated oven is essential—it kickstarts the rising process and ensures even cooking, giving you that irresistible golden-brown crust on the outside while keeping the inside perfectly gooey.
While your oven is heating, take a few minutes to get your components ready. Melt unsalted butter in a bowl and stir in freshly minced garlic along with chopped parsley or herbs like thyme or oregano. This rich, fragrant mixture will be brushed on your bombs both before and after baking, adding layers of flavor.
Meanwhile, prepare your refrigerated biscuit dough by gently separating and flattening each biscuit. Lay everything out in an assembly line: dough, cheese, garlic, butter, and baking sheet. This method not only makes the process smoother but also ensures consistent results across every single cheesy garlic butter bomb.
🧁 Pro tip: Use parchment paper on your baking sheet for easy cleanup and to prevent sticking—especially when that cheese inevitably bubbles out.
🌿 Add Your Personal Touch to Cheesy Garlic Butter Bombs
The beauty of Cheesy Garlic Butter Bombs is that they’re endlessly customizable to your taste. Once you master the base recipe, you can have fun experimenting and putting your own twist on every batch.
Flavor your butter: Instead of just garlic and parsley, try adding:
-
Smoked paprika for a hint of warmth and color
-
Grated parmesan for added richness
-
Red pepper flakes if you like a little heat
-
Dried Italian herbs like basil or oregano for a pizza-like aroma
Switch up the cheese: Mozzarella is classic, but you can mix and match:
-
Cheddar for a sharper bite
-
Pepper jack for a spicy version
-
Gruyère or gouda for a gourmet spin
-
Even vegan cheese for dairy-free diets
You can also add fillings like chopped pepperoni, roasted vegetables, or caramelized onions to the center for an extra savory surprise. Every batch of Cheesy Garlic Butter Bombs can become a new favorite—no two need to be the same!
🌟 Encourage guests or kids to help customize their own bombs. It’s a fun, hands-on way to involve everyone in the kitchen and adds a personal touch to every bite.
🧊 Storing & Reheating Cheesy Garlic Butter Bombs

One of the best parts about Cheesy Garlic Butter Bombs is that they taste just as delicious the next day—if they last that long! Whether you’re planning for leftovers or meal prepping in advance, storing and reheating them properly is key to keeping them soft and flavorful.
How to store:
-
Allow the bombs to cool completely after baking.
-
Place them in an airtight container and refrigerate for up to 3 days.
-
To prevent sogginess, layer parchment paper between them.
How to reheat:
-
Oven method (best): Reheat at 350°F (175°C) for 5–7 minutes until the exterior crisps up and the cheese melts inside.
-
Air fryer method: Heat at 320°F (160°C) for about 3–4 minutes for extra crispiness.
-
Microwave method: Use only if in a rush. Wrap in a damp paper towel and heat in 15-second bursts to avoid drying out.
Want to make them in bulk? Freeze them unbaked on a tray, then store in a freezer bag. When ready to serve, bake from frozen at 375°F, adding 3–5 minutes to the cooking time. You’ll have Cheesy Garlic Butter Bombs fresh any time—no defrosting needed!
❄️ Perfect for school lunches, game-day snacks, or surprise guests.
👨🍳 Chef’s Helpful Tips for Cheesy Garlic Butter Bombs Success
To ensure every batch of Cheesy Garlic Butter Bombs turns out beautifully, follow these pro tips from the kitchen:
-
Seal them well: One of the most common mistakes is under-sealing the dough. Make sure the edges are tightly pinched so the cheese doesn’t escape while baking.
-
Don’t skip fresh garlic: Pre-minced garlic from a jar can be convenient, but fresh garlic offers a deeper, richer flavor that truly defines this dish.
-
Brush twice: For maximum flavor and shine, brush the bombs once before baking and again immediately after they come out of the oven. The second brushing enhances the buttery flavor and gives a bakery-style finish.
-
Let them rest before serving: As tempting as they are straight out of the oven, give them 2–3 minutes to rest. The filling sets slightly, and you avoid burning your mouth with molten cheese.
These tips have made Cheesy Garlic Butter Bombs a go-to appetizer in my home. I’ll never forget a dinner party where they stole the spotlight—guests couldn’t get enough, and some even requested the recipe before dessert was served. Who knew dough, butter, and cheese could bring so much joy?
❓ Frequently Asked Questions About Cheesy Garlic Butter Bombs
1. What type of cheese works best for Cheesy Garlic Butter Bombs?
Mozzarella is the go-to choice for Cheesy Garlic Butter Bombs because of its excellent meltability and mild, creamy flavor that complements the garlic butter beautifully. However, you can customize your bombs by mixing in cheddar for sharpness, monterey jack for a creamier finish, or even gouda for a smoky twist. Want a bold flavor? Try a blend of cheeses for a gooey, complex filling that stands out.
🧀 Avoid using pre-shredded cheese, as it often contains anti-caking agents that prevent smooth melting. Freshly shredded is always best!
2. Can I make Cheesy Garlic Butter Bombs ahead of time?
Yes, Cheesy Garlic Butter Bombs are excellent for prepping in advance. Simply assemble them and place them on a parchment-lined tray. Cover and refrigerate for up to 24 hours before baking. When you’re ready, bake them straight from the fridge—just add 1–2 minutes to the bake time.
For longer storage:
-
Freeze unbaked bombs on a tray, then transfer to a freezer-safe bag.
-
Bake from frozen at 375°F (190°C), adding an extra 3–5 minutes.
❄️ This make-ahead feature makes them perfect for party planning, holiday meals, or last-minute guests.
3. How do I ensure my dough turns out soft and fluffy?
The key to achieving soft, pillowy dough in your Cheesy Garlic Butter Bombs is to handle it gently. Whether using biscuit dough or homemade yeast dough, avoid over-kneading or stretching it too much. Here’s how:
-
Let the dough rest at room temperature before shaping
-
Gently flatten each piece without pressing too hard
-
Pinch edges together softly to seal the filling without compacting the dough
🍞 Overworking the dough can make it dense and chewy, while a light touch preserves that buttery, melt-in-your-mouth texture.
🧈 Final Thoughts on Cheesy Garlic Butter Bombs
There’s something undeniably magical about Cheesy Garlic Butter Bombs—from the moment they go into the oven to the second they’re pulled out, golden and bubbling, the anticipation builds. These bite-sized wonders combine the best of comfort food: soft, pillowy dough, gooey melted cheese, and the rich, fragrant allure of garlic butter that fills your kitchen and tempts everyone to sneak a bite before they cool.
What makes them truly special is how effortlessly they bring people together. Whether you’re hosting a holiday gathering, planning a casual family dinner, prepping for game day, or just looking for a cozy snack on a rainy afternoon, Cheesy Garlic Butter Bombs fit every occasion. Their versatility means you can dress them up with herbs and exotic cheeses or keep them simple with just mozzarella and garlic—and they’ll still be the first thing gone from the table.
They’re easy to make, endlessly customizable, and absolutely unforgettable once you’ve had a bite. You don’t need to be a seasoned chef to create something this delicious—just a few pantry staples, a love for cheese, and the joy of sharing something homemade.
So go ahead—grab your ingredients, preheat your oven, and experience the simple pleasure of baking Cheesy Garlic Butter Bombs from scratch. One batch probably won’t be enough, but that’s okay—some recipes are meant to be repeated (and requested) over and over again.
👉 If you loved this recipe, don’t forget to leave a comment, rate it, and share your version on social media. Tag us with your creations—we can’t wait to see your cheesy masterpieces!
About HealthyBlog365
Welcome to HealthyBlog365, your go-to destination for all things food and drink. We believe that every meal is not just a way to nourish your body but also a meaningful connection with yourself and your loved ones.
HealthyBlog365 was created with a mission to inspire healthy living through nutritious meals and refreshing beverages. Here, you’ll discover a treasure trove of creative recipes, kitchen tips, and healthy eating trends tailored to fit modern lifestyles.
 What can you find on HealthyBlog365?
- Delicious and easy-to-make recipes: From simple meals for busy mornings to wholesome dinners for family gatherings, we’ve got you covered for every occasion.
- Nutritious drinks: Explore recipes for juices, smoothies, detox teas, and drinks that cleanse your body, boost your mood, and energize your day.
- Guides on eating habits: Get detailed insights into popular diets like keto, low-carb, and vegetarian-friendly meal plans.
- Kitchen hacks: Discover smart tips to save time, preserve food, and cook more efficiently.
We are committed to providing high-quality content, staying up-to-date with the latest trends, and maintaining a balance between nutrition and flavor.
 Connect with HealthyBlog365 on Social Media
Join the HealthyBlog365 community on social media platforms to stay updated with our latest posts, watch exciting tutorials, and share your food stories with us:
 Facebook: Follow us here to stay updated with our latest posts and join our community.
 Instagram: Check us out here for inspiring visuals and ideas.
 Pinterest: Pin with us here to save creative ideas you’ll love.
 YouTube: Subscribe here for detailed tutorials and exciting videos.
 Thank You for Supporting HealthyBlog365!
We aim to build a connected community where everyone can share and learn from each other. If you have any questions or suggestions, don’t hesitate to reach out to us via social media or our website.
We hope you have a wonderful time on HealthyBlog365 and find new inspiration for your healthy culinary journey!
Cheesy Garlic Butter Bombs
 Prep Time 10 minutes Cook Time 15 minutes Total Time 25 minutes
 Description
Ingredients
- refrigerated biscuit dough (8-count)
- shredded mozzarella cheese
- cloves fresh garlic, minced
- unsalted butter, melted
- fresh parsley, chopped (optional)
Instructions
- Preheat your oven to 375°F (190°C).
- Open and separate the biscuit dough into individual pieces.
- In the center of each biscuit, place about 1 tablespoon of mozzarella cheese and a pinch of minced garlic.
- Fold the edges of each biscuit around the filling and seal tightly.
- Melt the unsalted butter and mix in any remaining minced garlic and chopped parsley.
- Place sealed biscuits on a parchment-lined baking sheet and brush them with the garlic butter mixture.
- Bake for 12-15 minutes until golden brown.