
Imagine biting into a crispy golden exterior that suddenly erupts with molten, gooey cheese. These Cheesy Bombs with Melty Cheese are not just a snack – they’re a culinary experience. They turn ordinary moments into delectable memories and have become the ultimate crowd-pleaser, capturing the hearts of food lovers everywhere.
Whether you’re hosting a game night, preparing a quick appetizer, or simply craving something indulgent, Cheesy Bombs with Melty Cheese promise to elevate your culinary game. The magic lies in their simple yet perfect design – a warm, crispy shell conceals a rich, melting cheese center that stretches with every bite.
Key Takeaways
-
Cheesy Bombs with Melty Cheese offer an explosive flavor experience
-
Perfect for parties, snacks, and entertaining
-
Easy to prepare with minimal ingredients
-
Versatile and adaptable to different cheese types
-
Guaranteed to impress both kids and adults
What Are Cheesy Bombs with Melty Cheese and Why They’re Trending
Cheesy Bombs with Melty Cheese have become a rising star in the food world. These irresistible, cheese-filled bread bites are both visually stunning and incredibly flavorful. With their crispy outer shell and gooey, molten cheese center, it’s no surprise that food lovers everywhere are falling in love with this snackable sensation.
The Visual Appeal of Cheesy Bombs with Melty Cheese
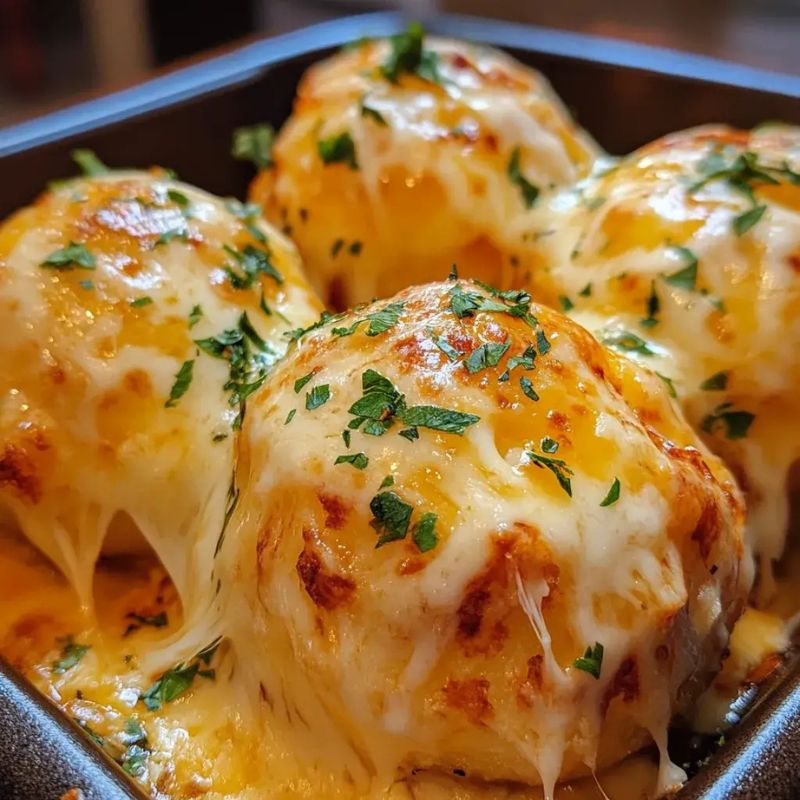
Imagine a mouthwatering array of golden-brown savory bites, oozing with melted cheese. Cheesy Bombs with Melty Cheese are typically arranged artfully on rustic wooden boards, garnished with fresh herbs. The contrast between the crisp exteriors and soft, cheesy interiors creates a satisfying texture that feels both indulgent and comforting.
In cozy kitchen settings, warm lighting enhances their homemade charm. It’s the kind of dish that photographs beautifully – making it a favorite for food bloggers and social media foodies.
Origins of Cheesy Bombs
The idea of Cheesy Bombs with Melty Cheese began with simple cheese-filled pastries and evolved into a trendy dish combining comfort food and innovation. Home cooks and professional chefs alike began experimenting with different cheese blends and dough styles, resulting in endless variations of this tasty bite.
The Social Media Boom
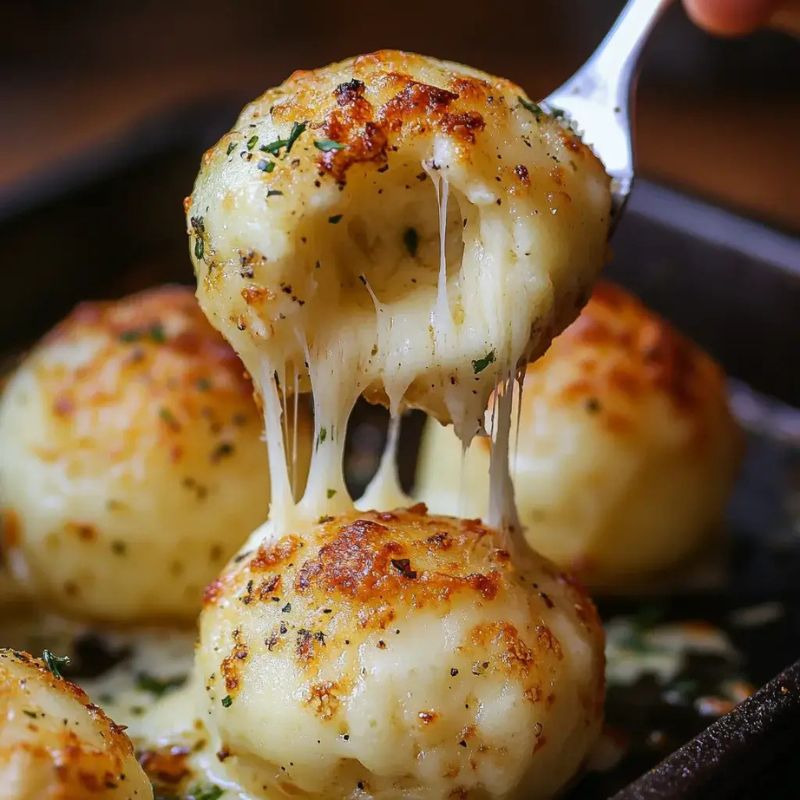
Thanks to platforms like Instagram, TikTok, and Pinterest, cheesy bombs went viral. The irresistible cheese pull in videos and photos grabs instant attention. Influencers, foodies, and cooking shows regularly share their cheesy bomb recipes, garnering millions of views and encouraging others to try the trend.
Why Food Enthusiasts Love Cheesy Bombs with Melty Cheese
Here’s what makes them a favorite:
-
✅ Irresistible cheese pull factor
-
✅ Customizable with various cheeses and spices
-
✅ Quick and easy to make at home
-
✅ Ideal for parties, appetizers, or comfort snacking
-
✅ Loved by both kids and adults
| Feature | Appeal |
|---|---|
| Texture | Crispy exterior, gooey interior |
| Versatility | Great as an appetizer or mini meal |
| Flavor Profile | Rich, indulgent, and crowd-pleasing |
Essential Ingredients for Perfect Cheesy Bombs with Melty Cheese
Creating the ultimate Cheesy Bombs with Melty Cheese begins with the right ingredients. These simple components come together to transform basic dough into irresistible, cheese-filled bites that everyone will love.
Visual Inspiration
Picture a neatly arranged still life on a rustic wooden table, bathed in warm, natural lighting. In the foreground, a variety of cheeses – grated parmesan, sliced cheddar, and crumbled feta – spill out from a ceramic bowl. Nearby, freshly prepared bread dough sits, soft and pillowy, ready to be stuffed. A cluster of herbs and spices – rosemary, thyme, and garlic powder – rests mid-frame, adding flavor and aroma. The background hints at a cozy, homemade atmosphere, tying the scene together with a sense of artisanal anticipation.
Key Ingredients for Cheesy Bombs with Melty Cheese
To make your Cheesy Bombs with Melty Cheese unforgettable, you’ll need three essential components:
-
🥖 Bread Dough – Choose a soft dough like pizza dough or homemade white bread dough for a pillowy bite.
-
🧀 Cheese Selection – Use cheeses that melt beautifully, like mozzarella, cheddar, provolone, or cream cheese for added richness.
-
🌿 Flavor Enhancers – Add dried herbs like oregano or thyme, garlic powder, or fresh parsley to elevate the flavor profile.
Step-by-Step Guide to Making Cheesy Bombs with Melty Cheese
Making Cheesy Bombs with Melty Cheese at home is fun, simple, and oh-so-rewarding. Whether you’re prepping for a party, a movie night, or just craving something gooey and delicious, these bite-sized treats are guaranteed to impress.
Cozy Kitchen Vibes
Imagine a warm, inviting kitchen counter, where a wooden cutting board holds freshly grated cheese, diced onions, and a rolling pin. In the foreground, hands gently wrap dough around cubes of cheese, forming perfect little bombs. Natural sunlight pours through a nearby window, casting a glow that highlights each step of this comforting creation. The aroma of baking bread and melted cheese fills the air—this is homemade magic in motion.
🥖 Step 1: Preparing the Dough
Your dough sets the foundation for perfect Cheesy Bombs with Melty Cheese. Here’s how to do it right:
-
✅ Use warm water to activate your yeast
-
✅ Knead until smooth and elastic
-
✅ Let it rise in a warm, draft-free place for 1 hour
-
✅ After rising, punch it down and let it rest for 10 more minutes
🧀 Step 2: Cheese Filling Techniques
The heart of any cheesy bomb is, of course, the cheese! Follow these tips to get the best melty center:
-
✅ Cut cheese into uniform cubes for even melting
-
✅ Keep cheese cold for easier handling
-
✅ Wrap dough around the cheese and seal edges tightly
-
✅ Use mozzarella, cheddar, provolone, or a combo for maximum gooeyness
🔥 Step 3: Baking Tips for Golden Perfection
This is where the cheesy magic happens. For best results:
-
✅ Preheat oven to 375°F (190°C)
-
✅ Line baking tray with parchment paper
-
✅ Brush bombs with garlic butter or egg wash before baking
-
✅ Bake for 12–15 minutes until golden brown and the cheese is melted
Best Cheese Combinations for Cheesy Bombs with Melty Cheese
Choosing the right cheese is the key to crafting perfect Cheesy Bombs with Melty Cheese. The ideal blend creates a flavor-packed center with a satisfying stretch and creamy melt. Whether you’re making snacks or party appetizers, your cheese combo can make or break the bite.
🧀 Understanding Cheese Melting Qualities
Different cheeses melt in different ways—some stretch beautifully, while others add bold flavors and creamy texture. A great melty cheese bomb relies on using cheese blends that deliver both gooeyness and depth of taste.
🔥 Top Cheese Picks for Melty Cheese Bombs
-
Mozzarella – Offers the classic stretchy pull and mild creamy flavor
-
Sharp Cheddar – Adds a tangy kick with a good melt
-
Gruyère – Delivers smooth melting with nutty, rich undertones
-
Brie – Provides a creamy, luxurious mouthfeel and melts like butter
-
Gouda – Smooth, sweet, and rich, with excellent melting ability
💡 Why Blending Cheeses Works Best
Experts agree: mixing cheeses takes your Cheesy Bombs with Melty Cheese from simple to gourmet. Blended fillings combine textures and flavors for that rich, restaurant-quality bite. Try a mix like mozzarella + sharp cheddar, or Gruyère + brie for a next-level combo.
🧾 Cheese Comparison Chart
| Cheese Type | Melting Quality | Flavor Profile |
|---|---|---|
| Mozzarella | Excellent | Mild, Creamy |
| Sharp Cheddar | Good | Tangy, Bold |
| Gouda | Very Good | Rich, Smooth |
| Gruyère | Excellent | Nutty, Buttery |
| Brie | Great | Creamy, Mildly Earthy |
Mastering the Art of Cheesy Garlic Bread Bombs
Creating the perfect Cheesy Garlic Bread Bombs isn’t just about baking—it’s about transforming simple ingredients into golden, gooey, flavor-packed bites that wow every time. These aren’t just side dishes—they’re the highlight of any table.
Garlic Butter Preparation
The soul of any great cheesy garlic bread bomb lies in the garlic butter. Here’s how to create a flavorful foundation:
-
Mince fresh garlic finely for bold aroma
-
Use unsalted butter, softened at room temperature
-
Mix until fully incorporated
-
Add a pinch of salt to enhance all flavors
A well-balanced garlic butter will seep into the bread, creating an unforgettable taste and aroma.
Seasoning Suggestions
Elevate your Cheesy Garlic Bread Bombs with these simple yet impactful toppings:
-
Fresh parsley for color and brightness
-
Dried oregano for a Mediterranean twist
-
Red pepper flakes for a hint of heat
-
Grated Parmesan to double the cheesy goodness
Sprinkle herbs and Parmesan right after baking while the bread is still hot for maximum flavor.
Texture Enhancement Tips
The perfect cheesy garlic bread bomb has two essentials: crispy outside, melty inside. Here’s how to achieve that:
-
Brush with egg wash before baking for a golden finish
-
Bake at 425°F (218°C) for 12–15 minutes
-
Let them rest 2–3 minutes after baking to allow the cheese to settle and avoid burning your mouth
When you combine buttery garlic, stretchy cheese, and a golden crust in one bite, you get Cheesy Garlic Bread Bombs that are simply irresistible. Whether you serve them as appetizers, snacks, or part of a hearty meal, they’ll always steal the show.

Creative Variations of Loaded Cheese Bread
Turn your classic stuffed cheesy bites into something special with these creative recipe ideas. By experimenting with new flavors and ingredients, your loaded cheese bread can go from a simple snack to a gourmet experience.
Your loaded cheese bread is a blank canvas for culinary creativity. Try mixing in unexpected ingredients that surprise and delight every bite.
Spicy Southwest Stuffed Cheesy Bites
This version adds a bold, zesty kick. Here’s what to include:
-
Diced jalapeños for heat
-
Crumbled chorizo for savory depth
-
Pepper jack cheese for melt and spice
Mediterranean-Inspired Loaded Cheese Bread
Light and herbaceous, this version is perfect for summer nights:
-
Sun-dried tomatoes for sweet-tangy flavor
-
Crumbled feta cheese for saltiness
-
A light drizzle of olive oil for richness
Breakfast-Style Stuffed Cheesy Bites
A comforting and satisfying twist, great for brunch or late-night cravings:
-
Crispy bacon pieces for texture
-
Fluffy scrambled eggs as the core filling
-
A blend of cheddar cheese for a classic finish
Each variation introduces a fresh flavor journey, making your loaded cheese bread more exciting and personalized. Don’t be afraid to invent your own twist.
Quick Comparison of Flavor Profiles
| Variation Style | Key Ingredients | Flavor Profile |
|---|---|---|
| Spicy Southwest | Chorizo, Jalapeños | Bold, Zesty |
| Mediterranean | Sun-Dried Tomatoes, Feta | Tangy, Herbaceous |
| Breakfast Style | Bacon, Scrambled Eggs | Rich, Comforting |
Presentation makes a big difference. Garnish your bread with fresh herbs, serve it warm, and watch your guests’ faces light up with delight.
Tips for Achieving the Perfect Cheese Explosion
Making the ultimate Cheesy Bombs with Melty Cheese requires skill, precision, and a solid understanding of how cheese behaves during baking. These irresistible bites are all about that unforgettable moment—when the gooey, stretchy cheese pulls perfectly with every tear.
To master Cheesy Bombs with Melty Cheese, you need to focus on a few critical factors. These are the game-changers that turn a simple recipe into a next-level snack.
Temperature Control Secrets
One of the most important elements in creating a perfect cheese explosion is temperature. If it’s too low or too high, the cheese won’t melt evenly—or worse, it could leak before the bread is fully baked.
-
Preheat your oven to 375°F (190°C)
-
Use an oven thermometer to ensure accuracy
-
Place the tray on the middle rack for even heat distribution
-
Avoid opening the oven door too often, which can lower the temperature and disrupt the melt
Selecting the Right Cheese
Not every cheese works well for Cheesy Bombs with Melty Cheese. You’ll want cheeses that melt beautifully and add rich flavor:
-
Mozzarella – Classic stretch and melt for that iconic cheese pull
-
Cheddar – Sharp, bold flavor and solid meltability
-
Gruyère – Elegant, creamy, and smooth
-
Fontina – Buttery, soft, and underrated in cheese bombs
Combining multiple cheeses can take your cheesy bombs to a whole new level of taste and texture.
Avoiding Common Pitfalls
Even with quality ingredients, a few small mistakes can ruin your Cheesy Bombs with Melty Cheese. Keep these tips in mind:
-
Don’t overstuff—too much cheese can cause leaks
-
Seal the dough tightly to hold the cheese inside
-
Use finely grated cheese for even melting
-
Let the bombs rest for 3–5 minutes after baking to avoid burning and allow cheese to set perfectly
With these tips, your Cheesy Bombs with Melty Cheese will be golden, gooey, and sure to wow any crowd. A perfect cheese explosion is all about finding the balance between flavor, texture, and baking technique.
FAQ – Cheesy Bombs with Melty Cheese
1. What are Cheesy Bombs with Melty Cheese?
Small bread bites filled with gooey, melted cheese and wrapped in a crispy shell. Cheesy Bombs with Melty Cheese are perfect as snacks or appetizers that everyone loves.
2. Are they hard to make?
Not at all. With the right ingredients and a few basic steps, Cheesy Bombs with Melty Cheese are easy to make at home.
3. Best cheeses to use?
Mozzarella for stretch, cheddar for bold flavor, and brie or camembert for creaminess. Mixing cheeses gives your Cheesy Bombs with Melty Cheese extra depth and texture.
4. Can I make them ahead of time?
Yes. You can prepare Cheesy Bombs with Melty Cheese in advance, refrigerate or freeze them, and bake fresh when ready to serve.
5. Are they vegetarian?
Yes. Cheesy Bombs with Melty Cheese are naturally vegetarian. You can add herbs, roasted vegetables, or different cheeses for variety.
6. How to stop cheese from leaking?
Seal the dough tightly, don’t overfill, use room-temperature cheese, and chill Cheesy Bombs with Melty Cheese before baking to keep them intact.
7. Any fun variations?
Try garlic butter bombs, pizza-inspired versions with marinara, or sweet cream cheese fillings. Customize your Cheesy Bombs with Melty Cheese with spices and herbs for fun flavor twists.
8. How should I serve them?
Serve Cheesy Bombs with Melty Cheese warm on a wooden board or skillet. Pair with dips like marinara, ranch, or garlic aioli for extra flavor.
Conclusion
Cheesy bombs have redefined how we enjoy snacks—crispy on the outside, gooey on the inside, and always crowd-pleasing.
Whether you’re a beginner or seasoned cook, making cheesy bombs is fun and rewarding. They’re perfect for parties, cozy nights in, or just treating yourself.
Don’t be afraid to get creative. Try new cheeses, flavors, and shapes. Every batch is a chance to improve and discover your own style.
Keep practicing, have fun with it, and share your cheesy bomb creations with the world. Who knows? Your recipe might just go viral.
Happy baking—and enjoy every cheesy bite!
About HealthyBlog365
Welcome to HealthyBlog365, your go-to destination for all things food and drink. We believe that every meal is not just a way to nourish your body but also a meaningful connection with yourself and your loved ones.
HealthyBlog365 was created with a mission to inspire healthy living through nutritious meals and refreshing beverages. Here, you’ll discover a treasure trove of creative recipes, kitchen tips, and healthy eating trends tailored to fit modern lifestyles.
 What can you find on HealthyBlog365?
- Delicious and easy-to-make recipes: From simple meals for busy mornings to wholesome dinners for family gatherings, we’ve got you covered for every occasion.
- Nutritious drinks: Explore recipes for juices, smoothies, detox teas, and drinks that cleanse your body, boost your mood, and energize your day.
- Guides on eating habits: Get detailed insights into popular diets like keto, low-carb, and vegetarian-friendly meal plans.
- Kitchen hacks: Discover smart tips to save time, preserve food, and cook more efficiently.
We are committed to providing high-quality content, staying up-to-date with the latest trends, and maintaining a balance between nutrition and flavor.
 Connect with HealthyBlog365 on Social Media
Join the HealthyBlog365 community on social media platforms to stay updated with our latest posts, watch exciting tutorials, and share your food stories with us:
 Facebook: Follow us here to stay updated with our latest posts and join our community.
 Instagram: Check us out here for inspiring visuals and ideas.
 Pinterest: Pin with us here to save creative ideas you’ll love.
 YouTube: Subscribe here for detailed tutorials and exciting videos.
 Thank You for Supporting HealthyBlog365!
We aim to build a connected community where everyone can share and learn from each other. If you have any questions or suggestions, don’t hesitate to reach out to us via social media or our website.
We hope you have a wonderful time on HealthyBlog365 and find new inspiration for your healthy culinary journey!

Cheesy Bombs with Melty Cheese
 Prep Time 10 minutes Cook Time 15 minutes Total Time 25 minutes
 Description
Ingredients
- biscuit dough (refrigerated)
- shredded mozzarella cheese
- Parmesan cheese
- garlic powder
- dried oregano
- butter melted
- garlic salt
- Fresh parsley optional, for garnish
Instructions
- Step 1: Preheat and PreparePreheat oven to 375°F (190°C).Lightly grease a baking sheet or line with parchment paper.
- Step 2: Make the Cheese FillingIn a bowl, combine mozzarella cheese, Parmesan cheese, garlic powder, and oregano.
- Step 3: Assemble the BombsOpen the biscuit dough and separate it into individual biscuits.Flatten each biscuit into a small circle using your fingers.Place a generous spoonful of the cheese mixture in the center of each biscuit.Fold the edges of the dough over the cheese, pinching it to seal the edges. Form a ball.
- Step 4: Bake the Cheesy BombsPlace the cheese-filled balls on the prepared baking sheet.Brush the tops with melted butter and sprinkle with garlic salt.Bake for 12-15 minutes, or until golden brown and the cheese is melted inside.Step 5: ServeRemove from oven and let cool slightly.Optionally, garnish with fresh parsley. Serve warm and enjoy!