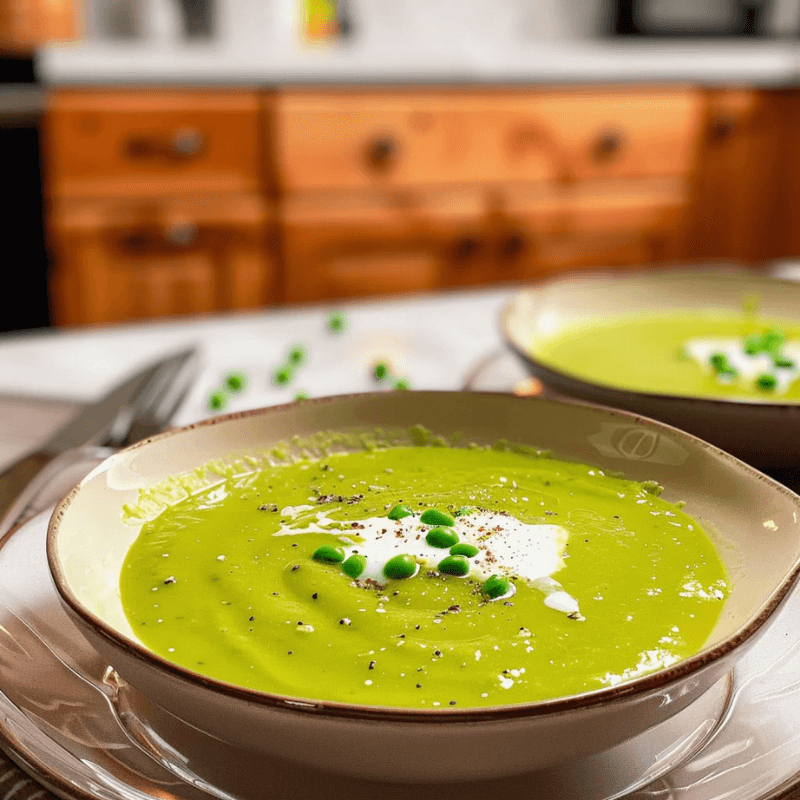
Spring pea soup transforms simple ingredients into a vibrant masterpiece in just 20 minutes, serving as a perfect quick meal for 6 people. However, many home cooks struggle to achieve that restaurant-quality bright green color and silky texture that makes this soup truly special.
In fact, we’ve discovered that using frozen peas works just as well as fresh ones, making this soup accessible year-round. With this in mind, I’m sharing my professional chef’s guide to creating the perfect spring pea soup – complete with the secrets to maintaining that beautiful green color and achieving the ideal creamy consistency while keeping it light at around 217 calories per serving.
We’ll explore everything from choosing the right peas to mastering the proper blending techniques, ensuring you can recreate this restaurant-worthy soup in your own kitchen. I’ll also show you how to incorporate fresh herbs and proper seasoning to convert even the strongest pea skeptics into devoted fans of this classic dish.
The Secret to Vibrant Green Pea Soup
The brilliant emerald hue of a perfect spring pea soup isn’t just visually appealing—it’s a sign of proper technique and ingredient respect. After years of perfecting this dish, I’ve discovered why most home cooks struggle to maintain that restaurant-quality vibrant green color.
Why most homemade pea soups turn dull
The primary culprit behind a dull-colored pea soup is oxidation. When pea cells are broken down during cooking, enzymes are released that react with oxygen, causing that gorgeous green to fade to an unappetizing brownish-olive color. This chemical reaction happens quickly, especially when peas are exposed to prolonged heat.
Another common mistake is adding salt or acidic ingredients too early in the cooking process. Many home cooks add salt, tomatoes, or lemon juice at the beginning, not realizing these ingredients actually harden legumes and prevent them from softening properly. As one expert notes, “You must only add salt and acid and all spices at the very end”.
Slow cookers, while convenient, can be especially problematic for maintaining color. The extended cooking time gives those oxidizing enzymes plenty of opportunity to work their color-dulling magic.
The quick-cooking method
The secret to maintaining that vibrant green color lies in what I call the “flash cooking” approach. Here’s my method:
- Start with frozen peas, which have already been briefly cooked and flash-frozen at peak freshness
- Sauté your aromatics (onions, garlic) separately first
- Add the frozen peas to hot liquid for just 2-3 minutes—only until they’re heated through
- Remove from heat immediately
This quick-cooking approach is crucial because, as professional sources confirm, “If you overcook them, they’ll start to lose color and flavor”. The key is remembering that frozen peas are already pre-cooked through the blanching process before freezing, so they only need to be warmed, not cooked from raw.
Furthermore, chilling your soup quickly after cooking can help preserve color. This works because temperatures below 40°F slow down the oxidation process. I often prepare an ice bath before cooking so I can rapidly cool the soup if I’m not serving it immediately.
Proper blending techniques
The blending stage is where many home cooks miss opportunities for that perfect spring pea soup texture. First, consider your equipment options:
An immersion blender allows you to blend directly in the pot, reducing oxidation from transferring hot soup. It gives you more control over texture but may not achieve the silkiest results.
A standard blender can create that velvety restaurant-quality texture, but requires careful handling. When using a standard blender, be sure to vent the lid slightly to prevent pressure buildup from hot steam, which could cause “little explosions of hot soup”.
For the smoothest, most refined result, blend for a full “minute or two for a very very smooth soup”. If you’re seeking absolute perfection, consider passing the blended soup through a fine-mesh strainer or food mill to remove any fibrous bits.
Finally, add my professional secret: a splash of lemon juice or crushed vitamin C tablet after blending. This “touch of acid prevents oxidation (which leads to browning) from occurring”, locking in that vibrant green color until serving time.
Choosing the Right Peas for Your Soup
The foundation of an exceptional spring pea soup begins long before the pot hits the stove. Selecting the right peas can make the difference between a lackluster bowl and a vibrant, flavorful masterpiece that delights with every spoonful.
Fresh vs. frozen: the surprising truth
Contrary to popular belief, frozen peas often outperform their fresh counterparts for soup-making. This might seem counterintuitive, yet frozen peas are harvested and flash-frozen at the peak of ripeness, locking in all that green glory and sweetness. Consequently, while fresh peas from the farmers’ market can sometimes turn starchy depending on when they were harvested, frozen peas remain reliably tender, sweet, and perfect.
For spring pea soup specifically, frozen peas provide consistent results year-round. Additionally, they require no shelling (saving valuable prep time) and often don’t even need thawing before being incorporated into your soup. Indeed, some chefs have found that after being disappointed by fresh peas multiple times, they’ve declared their loyalty to frozen peas, which “will never let you down”.
When cooking with frozen peas, remember this crucial tip: despite what package directions suggest, cook them for no longer than one minute. Overcooking causes them to lose their sweetness and distinctive “pop”. For soup preparation, you can add them directly from freezer to boiling water, stir once, then immediately strain.
Seasonal pea varieties and their flavors
For those determined to use dried or specialty peas, several excellent varieties exist:
- Green Split Peas – Sweeter than their yellow counterparts and most commonly used in traditional split pea soup
- Yellow Split Peas – Less sweet but sometimes used in Indian dal recipes due to their color
- Retrija (Latvian Gray Soup Pea) – A unique speckled brown variety with beautiful pink/red flowers, traditionally picked dry and cooked whole in soup
- St. Hubert’s – A productive green soup pea introduced to Canada by French settlers in the 1700s
- Swedish Red – Wine-colored seeds that turn chocolate brown when cooked, known for being incredibly productive and delicious
Split peas generally keep for several months when stored in an airtight container in a dry place away from light. Once cooked, they’ll stay fresh in the refrigerator for approximately 48 hours or can be frozen for longer storage.
How to test peas for sweetness
If you’re selecting fresh peas, avoid the common mistake of choosing the largest, plumpest pods. These more mature specimens may actually be inferior even to frozen peas. The younger, smaller pods typically contain the sweetest, most tender bounty.
When buying from a farmer’s market, one effective test is to pop open a pod on the spot. Small, bright green spheres indicate you’ve found high-quality peas. Furthermore, studies suggest peas are extremely sweet at the precise stage when the pod begins splitting.
Several factors can affect pea sweetness. Primarily, high heat can make peas bitter and toughen their pods. Similarly, dry soil or alternating wet/dry soil conditions negatively impact flavor. If bitterness has been an issue in your garden, consider using an organic mulch between rows to maintain consistent soil moisture.
By selecting the right peas—whether frozen for convenience and consistency or specialty varieties for unique flavors—you establish the essential foundation for a spectacular spring pea soup.
Essential Ingredients That Elevate Pea Soup
Behind every exceptional spring pea soup stands a supporting cast of carefully selected ingredients that transform simple peas into a memorable culinary experience. The bright flavor of peas needs both enhancement and balance—a culinary dance achieved through aromatics, herbs, quality liquids, and finishing elements.
The perfect aromatic base
The foundation of any excellent spring pea soup begins with a classic mirepoix—the French culinary term for a mixture of diced onions, carrots, and celery that creates a flavorful backbone. This trio provides depth without overwhelming the delicate pea flavor.
For best results, cook these aromatics slowly until they truly sweat—at least 10 minutes. This patience allows their natural sugars to develop, creating a sweet undertone that complements peas perfectly. Many chefs add garlic to this base, which introduces a subtle pungency that elevates the entire dish.
Some recipes incorporate leeks or shallots as alternatives to regular onions. These relatives offer a milder, more nuanced flavor profile that pairs beautifully with spring peas.
Herbs that complement peas naturally
Fresh herbs make all the difference in spring pea soup, bringing brightness and complexity:
- Mint: Perhaps the most natural pairing with peas, mint adds refreshing notes that enhance peas’ natural sweetness
- Parsley: Provides gentle herbaceous flavor and vibrant color
- Thyme: Adds earthy, slightly floral notes that ground the soup
- Bay leaves: Contribute subtle depth and complexity
Other complementary herbs include rosemary, marjoram, and even sage. Some chefs create herb bundles tied with twine for easy removal after cooking.
Liquid options: vegetable vs. chicken stock
The choice between vegetable and chicken stock significantly impacts your soup’s flavor profile. Though both work beautifully, they yield different results.
Vegetable stock creates a lighter soup that allows the peas’ delicate flavor to shine through. It’s ideal when you want to highlight the peas themselves and remains the preferred choice for vegetarian versions.
Chicken stock adds a richer, meatier background flavor that gives the soup more body and depth. Nevertheless, some chefs argue that chicken broth can overpower the delicate pea flavor, making the soup “more like chicken soup with peas” rather than true pea soup.
For a balanced approach, consider using half chicken broth and half water—this prevents the broth from dominating while still providing more flavor than water alone.
Finishing touches that make a difference
The final additions to spring pea soup often make the most significant difference in elevating it from good to exceptional.
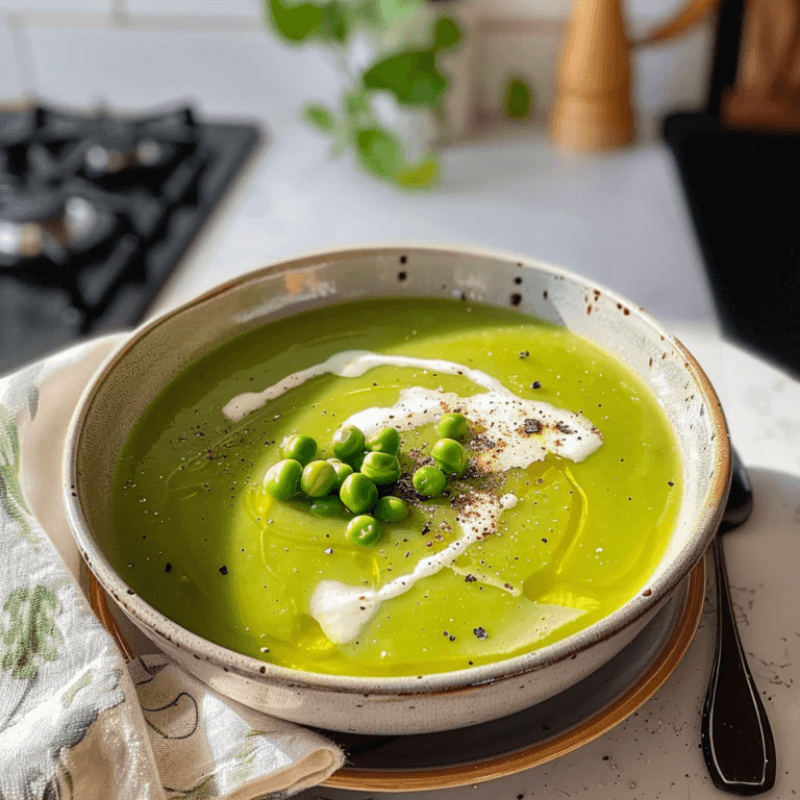
A splash of acidity—typically from fresh lemon juice—brightens all flavors and keeps the soup tasting fresh. This acid addition serves double duty by helping preserve the soup’s vibrant green color.
Fat additions like a drizzle of cream, olive oil, or even coconut milk round out flavors and add luxurious mouthfeel[49]. For texture contrast, consider adding garnishes like homemade croutons, a dollop of sour cream, or plain yogurt.
One chef’s secret: stirring in a couple teaspoons of Dijon mustard along with fresh parsley just before serving. This technique “livens everything up and really makes the soup taste incredible”.
Throughout each stage of preparation, remember that spring pea soup shines brightest when its supporting ingredients enhance rather than mask the star of the show—those sweet, vibrant spring peas.
Chef’s Step-by-Step Cooking Method
The execution phase of creating spring pea soup requires precise technique and timing to preserve that vibrant green color we’ve been discussing. Having prepared hundreds of batches in professional kitchens, I’ve refined a method that consistently produces exceptional results.

Preparing your mise en place
Proper preparation is the cornerstone of successful spring pea soup. First, measure all ingredients precisely and arrange them within arm’s reach. For standard spring pea soup, prepare:
- 3 cups split peas (if using dried) or 4-6 cups fresh/frozen peas
- 2 medium onions, finely diced
- 2-3 celery stalks, finely diced
- 2 medium carrots, finely diced
- 2 garlic cloves, minced
- 10 cups stock (vegetable or chicken)
- Fresh herbs (bay leaves, thyme)
Remember, “there is no need to fuss about the size of the diced vegetables” when making blended soup. Nonetheless, uniform cutting ensures even cooking.
The ideal cooking temperature and timing
The secret to perfect spring pea soup lies in controlling heat and timing. Begin by heating olive oil in a heavy-bottomed pot over medium heat. Add onions first with a pinch of salt and sauté until translucent (about 5 minutes). Subsequently, add garlic and sauté just until fragrant (approximately 30 seconds).
Following this, add liquid and remaining ingredients, bringing the mixture “just to a boil and then turn the heat down to a simmer”. This crucial temperature reduction prevents color degradation.
For frozen peas, cook merely 2-3 minutes after adding to hot liquid. Dried split peas require longer—approximately 45-60 minutes until tender. Throughout cooking, stir occasionally to prevent sticking.
Blending for the perfect texture
Once everything is cooked, the blending technique determines the final texture. An immersion blender offers convenience, allowing blending directly in the pot. Alternatively, a standard blender produces silkier results but requires caution—”please be careful when blending hot soup” as “trapped steam can cause little explosions”.
For restaurant-quality smoothness, blend for a full minute. Thereafter, taste and adjust seasonings as needed, remembering that salt should only be added at the end.
Troubleshooting Common Pea Soup Problems
Even expert chefs encounter challenges when making spring pea soup. After years of troubleshooting culinary mishaps, I’ve developed reliable solutions for the most common problems that might derail your soup.
Fixing a too-thick or too-thin consistency
Spring pea soup naturally thickens as it cools, primarily because starches and gelatin form a mesh structure. In fact, traditional Dutch pea soup is considered perfect when “a wooden spoon can be put upright in the pot.” Yet, not everyone prefers this consistency.
For soup that’s too thick, simply add water or broth gradually while heating slowly. This prevents the soup from sticking to the bottom and burning. Conversely, if your soup is too thin, you have several options:
First, continue simmering uncovered, allowing excess liquid to evaporate naturally. Alternatively, remove a portion of the soup, blend it thoroughly, then return it to the pot. For immediate results, add instant potato flakes one tablespoon at a time, stirring well between additions.
Rescuing a bland-tasting soup
Bland spring pea soup often results from insufficient seasoning or lack of aromatic foundation. When faced with flavorless soup, consider these enhancements:
- Add salt and freshly ground pepper (only after peas have softened)
- Incorporate bouillon cubes or paste for meaty depth
- Stir in sautéed onions, celery, and carrots
- Introduce fresh herbs like thyme or bay leaves
Since spring pea soup benefits from complex flavors, a splash of soy sauce or small amount of steak sauce can add unexpected depth. Moreover, a touch of acid—lemon juice or vinegar—brightens flavors significantly.
Solutions for grainy texture
That slightly chalky mouthfeel in spring pea soup isn’t necessarily a flaw—many consider it characteristic of the dish. Nevertheless, if you prefer silkier results, proper technique makes all the difference.
Extended blending significantly improves texture—aim for a full minute of high-speed blending rather than a quick pulse. For restaurant-quality smoothness, strain the blended soup through a fine-mesh sieve.
Old peas can remain stubbornly grainy regardless of cooking time. Although conventional wisdom suggests pre-soaking, the more critical factor is using fresh dried peas, ideally less than a year old.
Remember that adding salt or acidic ingredients too early can prevent peas from softening properly. Introduce these elements only after the peas have reached their desired tenderness.
Conclusion
Spring pea soup stands as a testament to how simple ingredients can create extraordinary results. Through my years as a professional chef, I’ve learned that success lies in the details – quick cooking to preserve color, choosing the right peas, and mastering proper seasoning techniques.
Many home cooks shy away from this classic dish, thinking it requires fresh peas or complex techniques. However, as we’ve seen, frozen peas often work better than fresh ones, and the cooking process becomes straightforward once you understand the core principles.
The key takeaway remains clear: respect your ingredients and follow proper technique. Start with good-quality peas, cook them briefly, blend thoroughly, and season at the right time. These steps will consistently produce that restaurant-quality bright green soup with perfect texture.
Remember that practice makes perfect. Your first attempt might not match a professional kitchen’s output, but each batch brings you closer to mastery. Soon enough, you’ll serve vibrant bowls of spring pea soup that will make your guests wonder about your culinary training.
 About HealthyBlog365
Welcome to HealthyBlog365, your go-to destination for all things food and drink. We believe that every meal is not just a way to nourish your body but also a meaningful connection with yourself and your loved ones.
HealthyBlog365 was created with a mission to inspire healthy living through nutritious meals and refreshing beverages. Here, you’ll discover a treasure trove of creative recipes, kitchen tips, and healthy eating trends tailored to fit modern lifestyles.
 What can you find on HealthyBlog365?
- Delicious and easy-to-make recipes: From simple meals for busy mornings to wholesome dinners for family gatherings, we’ve got you covered for every occasion.
- Nutritious drinks: Explore recipes for juices, smoothies, detox teas, and drinks that cleanse your body, boost your mood, and energize your day.
- Guides on eating habits: Get detailed insights into popular diets like keto, low-carb, and vegetarian-friendly meal plans.
- Kitchen hacks: Discover smart tips to save time, preserve food, and cook more efficiently.
We are committed to providing high-quality content, staying up-to-date with the latest trends, and maintaining a balance between nutrition and flavor.
 Connect with HealthyBlog365 on Social Media
Join the HealthyBlog365 community on social media platforms to stay updated with our latest posts, watch exciting tutorials, and share your food stories with us:
 Facebook: Follow us here to stay updated with our latest posts and join our community.
 Instagram: Check us out here for inspiring visuals and ideas.
- Pinterest: Pin with us here to save creative ideas you’ll love.
 YouTube: Subscribe here for detailed tutorials and exciting videos.
 Thank You for Supporting HealthyBlog365!
We aim to build a connected community where everyone can share and learn from each other. If you have any questions or suggestions, don’t hesitate to reach out to us via social media or our website.
We hope you have a wonderful time on HealthyBlog365 and find new inspiration for your healthy culinary journey!
Spring Pea Soup
 Prep Time 10 minutes Cook Time 20 minutes Total Time 30 minutes
 Description
Ingredients
- 4 cups fresh peas shelled
- 1 medium yellow onion chopped
- 2 cloves garlic minced
- 4 cups low-sodium vegetable broth
- 2 tbsp extra virgin olive oil
- Salt and pepper to taste
Instructions
- Heat olive oil in a large pot over medium heat. Add chopped onion and minced garlic; sauté for about 5 minutes until soft.
- Stir in fresh peas and vegetable broth, bringing the mixture to a gentle simmer. Cook for 10 minutes until peas are tender.
- Blend the soup until smooth using an immersion blender or regular blender in batches.
- Season with salt and pepper to taste. Optionally, stir in fresh herbs like mint or basil for added brightness.
- Serve warm or chilled, garnished with a drizzle of olive oil or croutons.