Did you know that Lemon Herb Roasted Chicken has earned an impressive 4.6 out of 5 stars from 743 home cooks?
Despite its gourmet appearance, you only need 6 ingredients and a single pan to create this crowd-pleasing dish. In fact, with just 15 minutes of prep time and some patience while it roasts, you’ll have a perfectly cooked chicken that serves 8 people.
Whether you’re cooking for a family gathering or planning a special dinner, we’ll show you how to achieve that coveted combination of juicy meat and crispy skin using a foolproof butter mixture of minced garlic, rosemary, thyme, and lemon zest. From selecting the right ingredients to mastering the perfect 425°F roasting temperature, we’ll guide you through each step to ensure your success.
Essential Ingredients for Lemon Herb Roasted Chicken
Creating the perfect Lemon Herb Roasted Chicken begins with selecting the right ingredients. The magic of this dish comes from the harmonious blend of quality poultry, aromatic herbs, and the right fats that create that irresistible flavor profile.

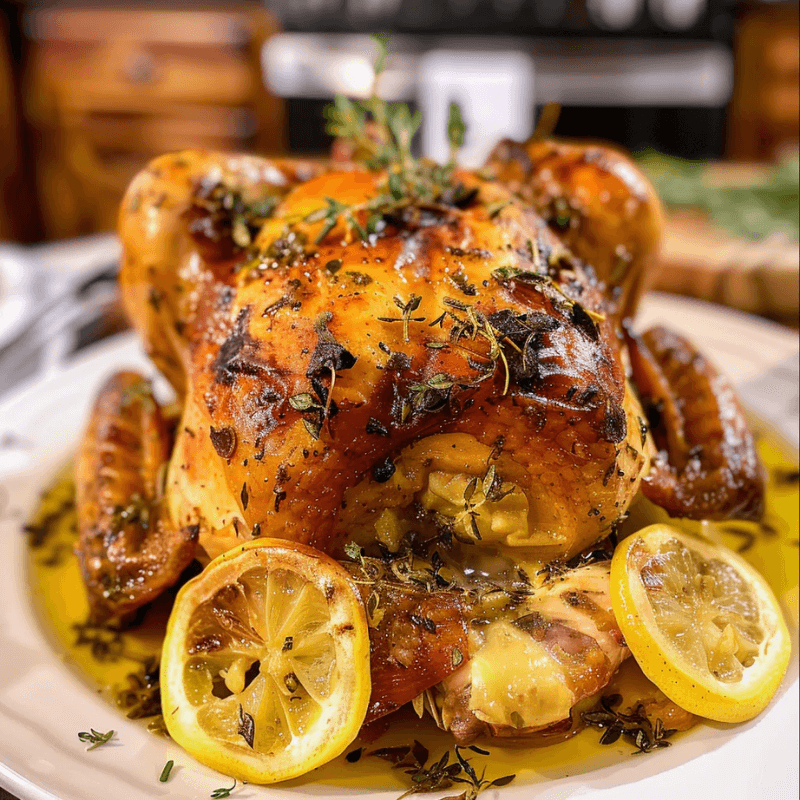
Perfectly juicy Lemon Herb Roasted Chicken – crispy on the outside, tender on the inside!
Quality Chicken Selection Guide
For the best results, I recommend starting with a whole chicken weighing between 3.5-5 pounds. A 4-pound bird offers the ideal balance for even cooking and serves about 4-6 people comfortably. When selecting your chicken, look for one with intact skin as this will be essential for creating that golden, crispy exterior everyone loves.
Before preparation, remove any giblets from the cavity and ensure the chicken is fully thawed if previously frozen. One crucial step often overlooked is thoroughly patting the chicken dry with paper towels, including inside the cavity. This simple technique significantly helps the skin crisp up beautifully during roasting.
Fresh vs. Dried Herbs: What Works Best
Fresh herbs undoubtedly elevate Lemon Herb Roasted Chicken to new heights through their dimensional flavor profile. Unlike their dried counterparts, fresh herbs provide a fuller spectrum of tastes – from bright top notes to deep, earthy undertones.
Rosemary and thyme are classic pairings with chicken, offering robust flavor that stands up well to roasting. Additionally, sage adds earthy notes, while parsley contributes freshness. For this recipe, fresh herbs are strongly preferred because they infuse the chicken with more complex flavors during the cooking process.
If you must substitute dried herbs, remember this crucial ratio: use 1/3 the amount of dried herbs compared to fresh. Therefore, if a recipe calls for 1 tablespoon of fresh rosemary, substitute with 1 teaspoon of dried. However, some herbs are simply better fresh – particularly delicate, leafy varieties like parsley, tarragon, and chives, which lose their distinctive character when dried.
Butter and Oil Options
The debate between butter and oil for roasting chicken centers around flavor versus functionality. Butter delivers exceptional flavor but has a lower smoke point, which can cause the skin to brown unevenly or burn at high roasting temperatures.
For the best of both worlds, I recommend a combination approach. Create a compound butter by mixing 4-5 tablespoons of softened unsalted butter with minced garlic, chopped rosemary, thyme, and lemon zest. This aromatic mixture becomes the secret weapon in your recipe.
The most critical technique for maximum flavor is applying this compound butter under the chicken skin. Carefully separate the skin from the meat using your fingers or a spoon to create pockets, then gently spread the butter mixture between the skin and meat. This technique not only amplifies flavor but also helps keep the meat incredibly juicy and tender.
For the exterior, consider using olive oil or ghee instead of butter. These fats have higher smoke points and help achieve that uniformly golden-brown, crispy skin we all crave. Furthermore, the oil helps seasonings adhere to the chicken surface for more consistent flavor.
Above all, remember that quality ingredients make a significant difference. Fresh lemons (both juice and zest), whole garlic cloves, and high-quality butter form the foundation of an exceptional Lemon Herb Roasted Chicken that will impress even the most discerning dinner guests.
Preparing Your Chicken for Roasting
The transformation from raw chicken to a perfectly roasted masterpiece requires proper preparation techniques. Now that we have our ingredients ready, let’s dive into the essential steps that set your Lemon Herb Roasted Chicken up for success.
How to Properly Clean and Pat Dry
Proper preparation begins with creating a clean workspace. Prior to handling the raw chicken, clear your countertop near the sink and set out paper towels, seasoning mixtures, and kitchen twine. This organization prevents cross-contamination and makes the process more efficient.
Start by removing any giblets from the cavity of your chicken. Subsequently, drain any liquid present in the cavity. Contrary to popular belief, you should not rinse the chicken as this spreads bacteria around your kitchen.
The most critical step is thoroughly patting the chicken dry with paper towels. This includes every nook and cranny of the bird—underneath the “armpits,” around the legs, and especially inside the cavity. Consider using multiple paper towels, leaving them inside the cavity for a minute to absorb excess moisture. Remember, moisture creates steam during cooking, and steam is the enemy of crispy skin.
Creating Flavor Under the Skin
Once your chicken is properly dried, it’s time to create flavor from the inside out. The secret to truly flavorful Lemon Herb Roasted Chicken lies in applying seasonings directly under the skin.
To begin, locate an area where the skin naturally separates from the meat, often near the cavity opening. Gently slide your fingertips between the skin and meat, working slowly to avoid tearing. Alternatively, use an upside-down dessert spoon—its curved shape naturally follows the chicken’s contours while minimizing skin tears.
After creating these pockets, insert your prepared herb-butter mixture under the skin. The majority of your flavored butter should go underneath rather than on top of the skin. This placement not only enhances flavor but also results in juicier meat since the butter melts directly into it during roasting. Moreover, placing garlic under rather than on the skin prevents burning.
For maximum impact, focus on the breast and thigh areas where the meat is thickest. Press gently on the skin after application to spread the butter mixture evenly. This under-skin technique delivers superior results since:
- It seasons the meat directly
- It creates better airflow for crispier skin
- It prevents herbs from burning
- It produces juicier, more flavorful meat
Trussing Techniques for Beginners
Trussing might seem intimidating, yet it’s essential for proper cooking as it ensures the chicken maintains its shape and cooks evenly. Here’s a simple trussing technique that takes less than a minute:
- Place a two-foot piece of kitchen twine beneath the chicken’s neck area
- Bring the string up toward the wings and legs
- Use your thumbs to tuck the wings against the body as you pull the string tight
- Loop the string between the legs and breast
- Make one overhand knot and pull firmly
- Bring the ends down between the legs, cross at the “ankles”
- Tie securely with a square knot
This basic trussing keeps the legs and wings firmly against the body, promoting even cooking and a more attractive presentation. Properly trussed chicken cooks more uniformly—essential when quick-roasting at high temperatures.
As a final touch before roasting, lightly season the exterior of your trussed chicken. Remember, we’ve already placed most of our seasoning under the skin, so you need much less on the surface. Then, if desired, make tiny holes in the skin with a metal skewer to help rendering fat escape, furthering the development of that coveted crispy exterior.
The Perfect Roasting Method
Roasting is where the magic happens for your Lemon Herb Roasted Chicken. After all the preparation, this critical step transforms your seasoned bird into a golden-brown masterpiece with juicy meat and crispy skin.
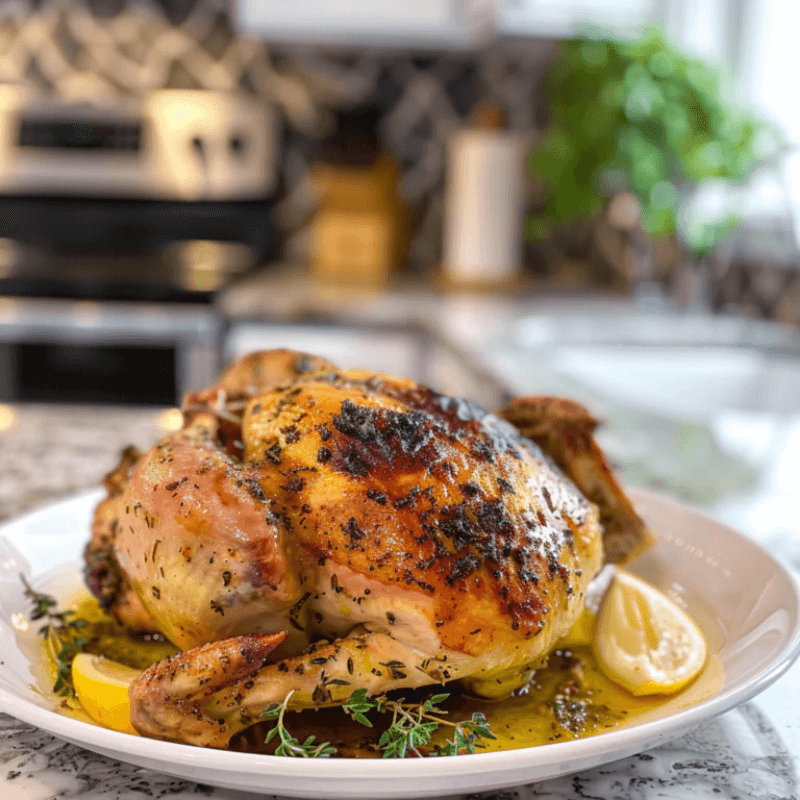
Homemade comfort food at its best! Try this Lemon Herb Roasted Chicken for a burst of fresh flavor!
Oven Temperature and Timing
The debate between high and low roasting temperatures centers around achieving two seemingly contradictory goals: crispy skin and juicy meat. For the best results, I recommend a two-temperature approach:
- Preheat your oven to 425°F (218°C)
- Roast at this high temperature for the first 30 minutes to crisp the skin
- For larger birds, consider reducing to 350°F (175°C) for the remainder of cooking
Most recipes suggest between 350°F and 425°F as the ideal roasting range. Generally, higher temperatures (400-425°F) produce crispier skin, whereas lower temperatures (350°F) yield more tender meat.
For timing, follow this simple formula: roast for about 18 minutes per pound. Accordingly, a 4-pound chicken typically requires approximately 1 hour and 15 minutes total cooking time.
Alternatively, some chefs recommend starting with 10-12 minutes at a higher temperature (450°F), followed by 20 minutes per pound at 350°F[51]. This technique seals in juices immediately while allowing even cooking afterward.
Using a Meat Thermometer Correctly
A meat thermometer is non-negotiable for perfectly roasted chicken. The FDA recommends chicken reach an internal temperature of 165°F for food safety. Here’s how to use your thermometer effectively:
Proper placement is crucial. Insert the thermometer into the thickest part of the breast, avoiding any bones. Measure about three-quarters along the breast, mark this point with your fingers, then insert the probe through the front of the breast to that depth.
If you have a second probe, place it in the thickest part of the thigh. The thermometer should never touch bone or go through to the cavity, as this causes inaccurate readings.
For optimal results, remove the chicken from the oven when the breast meat reaches 160°F. Indeed, the internal temperature will continue rising approximately 5 degrees during the resting period.
When to Add Vegetables
Adding vegetables creates a complete one-pan meal while enhancing flavor. For a 4-pound chicken, add vegetables after the first 30 minutes of roasting.
Arrange vegetables strategically around the chicken, not underneath it. Place onions and garlic in the center with the chicken on top, then arrange carrots, potatoes, and lemon wedges toward the edges of the pan. This elevates the chicken for more even cooking and adds flavor to the pan juices.
Flip vegetables once during cooking to ensure even caramelization. If needed, add more broth to prevent burning.
Troubleshooting Common Problems
Even experienced cooks occasionally encounter challenges when roasting chicken. Let’s tackle the most common issues that might arise when preparing your Lemon Herb Roasted Chicken and how to fix them quickly.
Elevate your dinner game with this Lemon Herb Roasted Chicken – golden, crispy, and packed with zesty goodness!
Dealing with Undercooked Chicken
Finding pink meat or blood near the bones can be concerning, yet easily resolved. First, verify with a meat thermometer – clear juices aren’t always a reliable indicator as some chickens may still show pinkish juices at 165°F.
If you’ve already sliced into an undercooked bird, heat pan juices or gravy until very hot, then slip the undercooked slices into the liquid to finish cooking. This method works wonderfully for pork and chicken alike. For intact birds, return to the oven, covered with foil to prevent further browning.
Alternatively, if only the cavity shows signs of blood while the thermometer reads done, ensure your thermometer isn’t touching bone during testing. Remember to test both breast and thigh areas for accurate readings.
Fixing Dry Breast Meat
Dry breast meat often results from uneven cooking or improper temperature monitoring. For juicier results, consider brining the chicken before roasting. This simple pre-treatment helps breast meat retain moisture throughout cooking.
Another effective technique is starting the bird breast-side down for the first 15-20 minutes, then flipping it over. This slows the cooking of white meat while dark meat gets a head start.
Most importantly, allow your Lemon Herb Roasted Chicken to rest covered with foil for at least 10-15 minutes after roasting. This crucial step allows juices to redistribute throughout the meat instead of running out when sliced.
Preventing Burnt Skin
That perfect golden-brown skin can quickly turn too dark while the meat remains undercooked. At the first sign of over-browning, loosely tent aluminum foil over the chicken. This shields the skin from direct heat while allowing the meat to continue cooking through.
For large chickens, consider a two-stage temperature approach: start at 400-425°F for 15 minutes to develop color, then reduce to 350°F until the internal temperature reaches 165-175°F.
A clever preventative measure involves creating a natural rack with sliced onions or citrus underneath the chicken. Beyond adding flavor, this technique lifts the bird slightly, allowing more even air circulation while protecting the underside from burning.
Remember to pat the chicken completely dry before roasting, as moisture creates steam that prevents proper crisping. Conversely, rubbing the skin with oil or butter helps it brown evenly rather than burn in spots.
Serving Your Lemon Herb Roasted Chicken
After mastering the roasting process, the final steps of resting and serving are equally crucial for your Lemon Herb Roasted Chicken. These finishing touches transform a good dish into an exceptional dining experience.
Proper Resting Time
Once your chicken reaches the proper internal temperature, resist the urge to carve immediately. Professional chefs recommend resting your roasted chicken for at least 30 minutes before cutting. This seemingly long wait serves several essential purposes: it allows the meat to surpass its peak temperature and begin cooling, consequently relaxing the muscle fibers and redistributing juices throughout the bird.
For maximum flexibility, you can safely rest an uncovered chicken for up to 59 minutes, a tented chicken for 73 minutes, or a foil-wrapped chicken (covered with a tea towel) for 100 minutes. Although this might seem excessive, covering the chicken during rest yields noticeably juicier results.
Carving for Beginners
Carving a whole chicken is simpler than it appears. First, ensure your chicken has properly rested. Begin by slicing the skin between the thigh and body, then cut through the exposed joint to separate the leg/thigh from the carcass. Repeat on the other side.
Next, remove the wings by pulling them away from the breast and cutting through the joint. Finally, tackle the breast meat by carefully slicing along the breastbone, following the rib cage until the entire breast is released. For presentation purposes, slice the breast diagonally into portions while keeping the crispy skin intact.
Simple Gravy from Pan Drippings
Never waste those flavorful pan drippings! To create a quick gravy, pour about ¼ cup of drippings into a pan, then whisk in 2½ tablespoons of all-purpose flour to form a roux. Cook over low heat until light brown and fragrant, approximately 5 minutes.
Gradually whisk in 2 cups of cold chicken stock, about ⅓ cup at a time, until thoroughly combined. Continue cooking while whisking constantly for 8-10 minutes until thickened. Season with salt and pepper to taste.
For the smoothest texture, consider straining the gravy before serving. If too thick, add more stock; if too thin, simmer longer until reduced.
Conclusion
Mastering Lemon Herb Roasted Chicken certainly requires attention to detail, though the results make every step worthwhile. Through careful ingredient selection, proper preparation, and the right roasting techniques, anyone can create this classic dish.
Remember that success lies in those essential details – patting the chicken completely dry, seasoning under the skin, and using a reliable meat thermometer. Most importantly, patience during the resting period rewards you with perfectly juicy meat and that coveted crispy skin.
Armed with these techniques and troubleshooting tips, you’ll confidently serve a restaurant-quality roasted chicken that will surely become your signature dish. Each time you prepare it, you’ll discover new ways to perfect your technique and make this timeless recipe truly your own.
 About HealthyBlog365
Welcome to HealthyBlog365, your go-to destination for all things food and drink. We believe that every meal is not just a way to nourish your body but also a meaningful connection with yourself and your loved ones.
HealthyBlog365 was created with a mission to inspire healthy living through nutritious meals and refreshing beverages. Here, you’ll discover a treasure trove of creative recipes, kitchen tips, and healthy eating trends tailored to fit modern lifestyles.
 What can you find on HealthyBlog365?
- Delicious and easy-to-make recipes: From simple meals for busy mornings to wholesome dinners for family gatherings, we’ve got you covered for every occasion.
- Nutritious drinks: Explore recipes for juices, smoothies, detox teas, and drinks that cleanse your body, boost your mood, and energize your day.
- Guides on eating habits: Get detailed insights into popular diets like keto, low-carb, and vegetarian-friendly meal plans.
- Kitchen hacks: Discover smart tips to save time, preserve food, and cook more efficiently.
We are committed to providing high-quality content, staying up-to-date with the latest trends, and maintaining a balance between nutrition and flavor.
 Connect with HealthyBlog365 on Social Media
Join the HealthyBlog365 community on social media platforms to stay updated with our latest posts, watch exciting tutorials, and share your food stories with us:
 Facebook: Follow us here to stay updated with our latest posts and join our community.
 Instagram: Check us out here for inspiring visuals and ideas.
- Pinterest: Pin with us here to save creative ideas you’ll love.
 YouTube: Subscribe here for detailed tutorials and exciting videos.
 Thank You for Supporting HealthyBlog365!
We aim to build a connected community where everyone can share and learn from each other. If you have any questions or suggestions, don’t hesitate to reach out to us via social media or our website.
We hope you have a wonderful time on HealthyBlog365 and find new inspiration for your healthy culinary journey!
Lemon Herb Roasted Chicken
 Prep Time 15 minutes Cook Time 2 hours 15 minutes Total Time 2 hours 30 minutes
 Description
Ingredients
- 1 whole chicken 4–5 pounds
- 2 fresh lemons
- 3 tablespoons extra virgin olive oil
- 4 garlic cloves
- 2 teaspoons fresh rosemary chopped
- 2 teaspoons fresh thyme leaves
- Salt and pepper to taste
Instructions
- Preheat your oven to 425°F (220°C).
- Pat the chicken dry with paper towels. Rub olive oil all over the chicken, squeezing juice from one lemon half over it. Season generously with salt and pepper.
- Stuff the cavity with garlic cloves, remaining lemon halves, rosemary, and thyme.
- Place the seasoned chicken breast-side up in a roasting pan. Roast for approximately 1 hour to 1 hour and 15 minutes until the internal temperature reaches at least 165°F (75°C).
- Remove from oven and let rest covered loosely with foil for 10-15 minutes before carving. Serve warm.