Honey balsamic brussels sprouts can turn all but one of these skeptics into devoted fans. These vegetables might have a bad reputation, but the perfect balance of sweet and salty flavors makes them a dish worthy of both weeknight dinners and holiday tables.
The recipe needs just 10 minutes of hands-on work to create perfectly caramelized sprouts. A high-temperature roast at 425°F and our special honey-balsamic glaze help you achieve that coveted crispy exterior consistently. This foolproof method will help you become skilled at preparing this nutritious side dish that delivers 4g of protein per serving, whether you love brussels sprouts or are just starting to explore them.
The Secret to Perfectly Crispy Brussels Sprouts
The gap between average and amazing Brussels sprouts comes down to one significant factor: crispiness. I found that there was a perfect golden exterior with a tender interior isn’t just luck—it’s science. Let me show you the techniques that will lift your honey balsamic Brussels sprouts from soggy disappointment to crispy perfection.
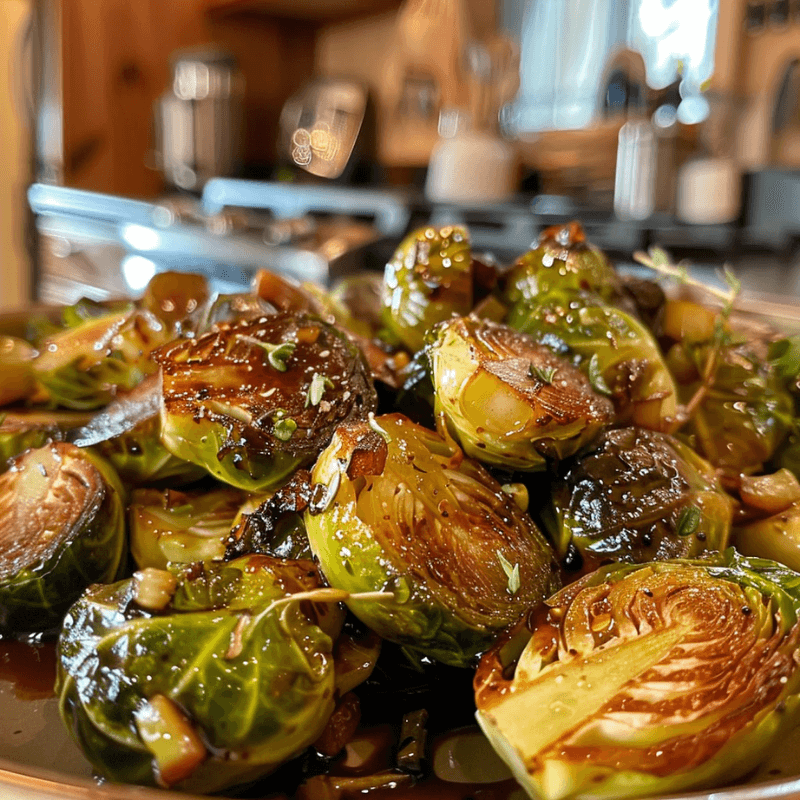
Sweet, tangy, and perfectly roasted – Honey Balsamic Brussels Sprouts are a flavor-packed side!
Why Brussels sprouts often turn out soggy
Brussels sprouts have turned many home cooks away after they ended up with mushy, sulfurous results. Here are the main reasons behind soggy sprouts:
- Using moist cooking methods like steaming or boiling, which release those unpleasant sulfurous compounds
- Overcrowding the baking sheet makes the sprouts steam instead of roast
- Using insufficient oil prevents proper caramelization
- Cooking at too low a temperature doesn’t allow proper browning
- Constantly stirring or flipping the sprouts interrupts the caramelization process
So these mistakes prevent Brussels sprouts from reaching their crispy potential. The good news? You can easily fix each of these problems.
The science behind crispy roasting
Brussels sprouts get crispy because of caramelization. High temperatures break down their natural sugars into simpler ones. This creates sweet, nutty flavors we love. The outer leaves become crunchy through dehydration.
Magic happens when you put halved Brussels sprouts cut-side down on a preheated baking sheet. This creates direct searing, like in a hot skillet. The flat edges become deeply golden and the insides steam within their own trapped moisture.
This dual-cooking method works wonders—trapped air creates tender centers while exposed surfaces turn deliciously crisp. Halving also increases surface area, which gives you more of those tasty browned edges.
You should never roast whole Brussels sprouts if you want them crispy. Whole sprouts taste fine but won’t develop the same caramelization and textural contrast.
Optimal oven temperature for crispiness
Temperature matters a lot with Brussels sprouts. Low heat won’t make them crispy. Your oven needs to be at least 400°F—though 425°F works even better. Some chefs crank it up to 450°F or even 500°F to get maximum crispiness.
High heat is important because it:
- Makes the exteriors caramelize quickly before the insides get mushy
- Creates sweet flavor compounds that balance any bitterness
- Stops sulfurous aromas from developing during slower cooking
This high-heat method is vital for honey balsamic Brussels sprouts. Caramelization builds natural sweetness that pairs perfectly with the honey balsamic glaze we’ll add later.
You’ll know your Brussels sprouts are perfectly crispy when they’re dark golden brown on the flat sides with slight charring on the outer leaves. A fork should slide in easily, though cooking times depend on your sprouts’ size and density.
Here’s a game-changing tip: preheat your baking sheet with the oven. The sprouts will sizzle right away when they hit the pan, which kicks off the browning process. These techniques will give you honey balsamic Brussels sprouts with crispy exteriors and tender, flavorful insides every time.
Selecting and Preparing Your Brussels Sprouts
Great honey balsamic brussels sprouts start way before they reach your oven. You’ll need quality sprouts and proper prep to create that perfect mix of crispy outsides and tender insides. My experience shows that most cooking fails happen because of poor choices or wrong prep, so let’s learn how to nail it from the start.
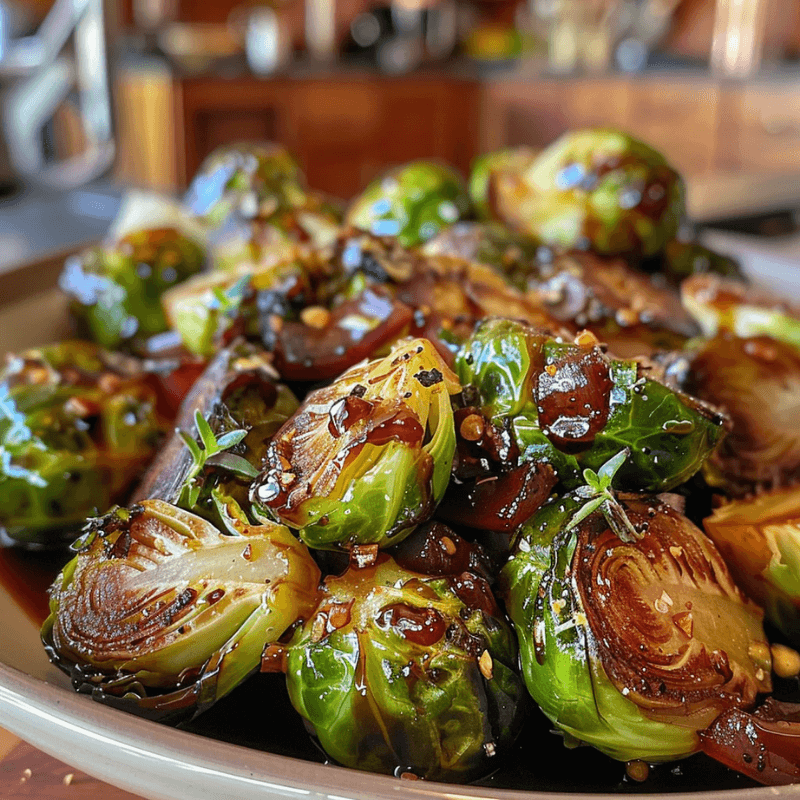
Golden, caramelized edges with a drizzle of honey and balsamic – veggie heaven!
How to choose the freshest sprouts at the store
You’ll find brussels sprouts at markets either sold loose by weight or still on their stalk. I always grab them on the stalk when possible because they stay fresh longer and hold more moisture. Both options can give you amazing results if you know what to look for.
These quality signs should guide your shopping:
- Bright green heads that feel firm with a gentle squeeze
- Tightly compacted leaves without holes or wrinkles
- Dry but not brown or moldy stem ends
- Similar sizes that cook evenly together
Size plays a huge role in flavor. Smaller sprouts (about 1 to 1½ inches across) taste sweeter and more tender. Larger ones have a stronger, cabbage-like taste. Smaller sprouts work better with honey balsamic since their sweetness matches the glaze perfectly.
A bit of yellow on outer leaves is okay, but skip any sprouts that show too much discoloration or feel mushy. Fresh sprouts should smell pleasant and herb-like, not strong or off-putting.
Proper cleaning and trimming techniques
Quality sprouts need the right prep. Start by soaking them in cold water for 5-10 minutes. Give them a good swish to remove dirt, grit, or tiny bugs hiding between leaves.
After soaking, grab a paring knife to trim the tough stem ends where they connected to the stalk. This small knife lets you work around the circular base easily. Cut just 1 cm (0.4 inch) – too much will make the leaves fall apart.
Next, pull off any yellow, wilted, or damaged outer leaves. This step makes them look better and removes tough parts that won’t cook well. Dry your sprouts completely with a clean dishcloth or paper towel – water droplets will stop them from getting crispy.
To halve or not to halve: size considerations
Making crispy honey balsamic sprouts means cutting most of them in half. This works best for several reasons.
Cut sides lay flat on the pan and caramelize beautifully. Direct contact with the hot surface creates that golden-brown exterior everyone loves.
The size after cutting affects how evenly and quickly they cook. Medium to large sprouts need halving lengthwise through the core. This keeps leaves together while the inside cooks through.
Here’s how to handle different sizes:
- Keep very small sprouts (under ¾ inch) whole, but cut a shallow cross in the stem
- Quarter extra-large ones so they cook at the same speed
- Always slice through the core to keep leaves from falling off
Your honey balsamic glaze will coat each piece evenly when they’re all similar sizes. Place them cut-side down on your baking sheet to get maximum crispiness.
Now that you’ve picked, cleaned, and prepped your sprouts perfectly, you’re ready to make that amazing honey balsamic glaze that will turn these simple veggies into something special.
Mastering the Honey Balsamic Glaze
The sticky-sweet glaze makes honey balsamic brussels sprouts magical. It revolutionizes ordinary roasted vegetables into something extraordinary. You need to become skilled at selecting and roasting techniques first. Then getting the glaze right becomes your next challenge. This simple yet sophisticated sauce makes the difference between good and unforgettable brussels sprouts.
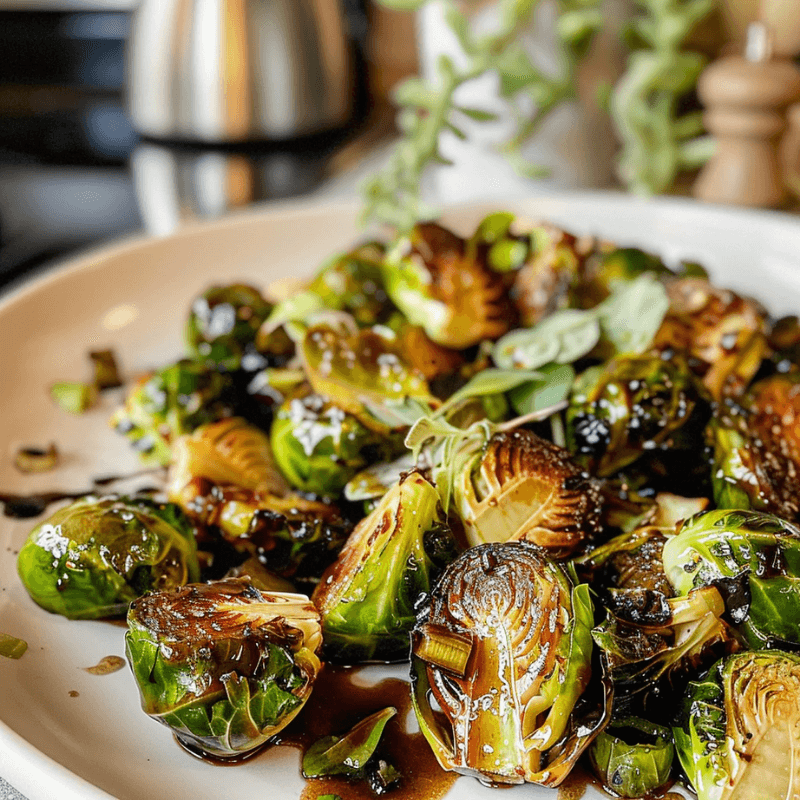
The perfect blend of crispy, sweet, and savory – Honey Balsamic Brussels Sprouts never disappoint!
The perfect ratio of honey to balsamic
The ideal honey balsamic glaze starts with the right proportions. My recipe testing shows you should use 2 parts balsamic vinegar to 1 part honey. A mix of ¼ cup balsamic vinegar with 2 tablespoons of honey creates perfect balance between tangy and sweet. This combination offsets the slight bitterness in brussels sprouts.
The vinegar’s acidity cuts through while honey provides sweetness that caramelizes beautifully. The sweetness doesn’t just add flavor—it balances the natural bitterness of brussels sprouts.
You have these options to make the glaze thicker:
- Reduce the mixture longer until it coats the back of a spoon
- Add a small amount of tapioca starch or cornstarch as a thickening agent
- Let the glaze cool slightly—it will naturally thicken
When to add the glaze for maximum flavor absorption
The timing is vital when adding honey balsamic glaze. Unlike marinades, never apply this glaze before roasting. Early addition risks burning the sugars, which creates bitter flavors and ruins your brussels sprouts.
The glaze works best when poured over properly roasted sprouts. Halved brussels sprouts soak up the mixture especially well through their cut sides. Many chefs toss hot roasted sprouts directly in the glaze. The residual heat helps absorption.
Here’s another approach: Simmer honey until amber-colored (3-4 minutes), take it off heat, add balsamic vinegar (it bubbles vigorously), then return to medium heat with butter until glossy and slightly thickened.
Enhancing your glaze with complementary flavors
The simple honey-balsamic combination improves with several complementary ingredients:
Savory enhancers: Minced garlic, whole grain Dijon mustard, or a pinch of salt balance the sweetness[142]. Fresh rosemary or thyme add aromatic depth.
Heat elements: Red pepper flakes or hot sauce create an exciting sweet-heat contrast.
Richness boosters: A tablespoon of butter at the end creates a glossy, rich mouthfeel that clings to the sprouts.
Alternative sweeteners: Maple syrup works like honey while maintaining similar sweet-savory balance.
Honey balsamic brussels sprouts shine in their versatility. The glaze pairs perfectly with holiday meals next to turkey and mashed potatoes. It’s simple enough for everyday dinners too. The leftover glaze stays fresh in the refrigerator for 3-4 weeks, ready to enhance future vegetable dishes.
Step-by-Step Roasting Method
Let’s focus on the vital roasting process that brings your prepped Brussels sprouts and glaze together. These specific techniques will help you become skilled at creating honey balsamic brussels sprouts with a perfect balance of caramelized exterior and tender interior.
Preheating secrets for better results
Your oven should be set to 425°F – the perfect temperature to achieve caramelization without burning. The baking sheet needs to go in the oven during preheating. This game-changing step makes the hot surface immediately sear your brussels sprouts’ cut sides, which kickstarts the browning process. The hot pan should be removed carefully. Drizzle it with olive oil before arranging your sprouts.
Proper spacing on the baking sheet
The arrangement on your baking sheet plays a significant role. Each halved sprout should be placed cut-side down to maximize contact with the hot surface. On top of that, it needs enough space around it. Crowded sprouts will steam instead of roast, and you won’t get that desired crispiness. Two baking sheets work better than cramming too many sprouts onto one pan.
The ideal roasting time and visual cues
The roasting process usually takes 17-25 minutes based on your sprouts’ size. The technique is different from most roasted vegetables – many experts suggest you avoid stirring or flipping brussels sprouts while they cook. The pan might need rotation halfway through to cook evenly.
Your honey balsamic brussels sprouts show perfect roasting when:
- The cut sides display a deep golden brown color
- The outer leaves show slight charring
- A fork easily pierces the center
The honey balsamic glaze should be applied right after roasting while the sprouts remain hot. This helps the glaze stick perfectly to all those caramelized edges and maximizes flavor absorption.
Troubleshooting Common Brussels Sprouts Problems
Even seasoned home cooks struggle with brussels sprouts sometimes. These simple-looking vegetables can be quite tricky to cook. Most problems have easy solutions that will get your honey balsamic brussels sprouts tasting great again.
Fixing burnt exteriors with undercooked interiors
The biggest problem comes from cooking sprouts at too high a temperature without thinking about their size. Your sprouts hit what I call the “brussels sprouts paradox” when the outside burns before the inside cooks.
Here’s how to fix it:
Adjust your temperature to 400°F if you notice repeated burning. Larger sprouts need to be cut in half, especially ones that are an inch around or bigger. This helps them cook evenly.
You can loosely cover the pan with foil if you see the exteriors getting too brown halfway through cooking. The trapped moisture helps cook the inside while protecting the outside from burning more. Remember that “brown is good” – what looks burnt might actually be perfect caramelization with great flavor.
Rescuing soggy sprouts
Brussels sprouts get soggy because of wrong cooking methods or not drying them well enough. You can save them in several ways:
To prevent sogginess, give each sprout enough space in the pan. Crowded sprouts steam instead of roast. The right amount of oil (2 tablespoons per pound) and proper spacing create crispy sprouts.
You can rescue soggy sprouts by putting them under the broiler for 2-3 minutes. Quick high heat removes extra moisture and brings back some crunch. Make sure to spread them out on a baking sheet so this works well.
Adjusting for different oven types
Your oven’s heat distribution makes a big difference in how your honey balsamic brussels sprouts turn out. Gas ovens create more moisture, while electric ovens have hot spots.
Here’s a simple timing guide based on temperature:
- At 350°F: roast for about 60 minutes
- At 375°F: roast for about 45 minutes
- At 400°F: roast for about 30 minutes
Put your oven rack in the upper third to get more direct heat. Reduce temperature by 25°F in convection ovens. Look for visual cues rather than just following times. Perfect roasted brussels sprouts should have almost black spots and tender but firm insides.
Conclusion
The art of perfecting honey balsamic brussels sprouts demands attention to detail, but the outcome makes every step worth it. A combination of fresh sprout selection, proper preparation, and exact temperature control helps anyone create this delicious side dish that turns skeptics into fans.
My kitchen experiments prove that success depends on significant details. The baking sheet needs preheating, sprouts require proper spacing, and the honey balsamic glaze must be added at the perfect moment. Your first attempts might face some challenges, but our troubleshooting tips will guide you toward excellent results consistently.
Perfectly roasted brussels sprouts display a deep golden-brown color and slightly charred edges while their centers remain tender and flavorful. These techniques and insights will make brussels sprouts a frequent choice not just for special occasions but also for your everyday dinner menu.
 About HealthyBlog365
Welcome to HealthyBlog365, your go-to destination for all things food and drink. We believe that every meal is not just a way to nourish your body but also a meaningful connection with yourself and your loved ones.
HealthyBlog365 was created with a mission to inspire healthy living through nutritious meals and refreshing beverages. Here, you’ll discover a treasure trove of creative recipes, kitchen tips, and healthy eating trends tailored to fit modern lifestyles.
 What can you find on HealthyBlog365?
- Delicious and easy-to-make recipes: From simple meals for busy mornings to wholesome dinners for family gatherings, we’ve got you covered for every occasion.
- Nutritious drinks: Explore recipes for juices, smoothies, detox teas, and drinks that cleanse your body, boost your mood, and energize your day.
- Guides on eating habits: Get detailed insights into popular diets like keto, low-carb, and vegetarian-friendly meal plans.
- Kitchen hacks: Discover smart tips to save time, preserve food, and cook more efficiently.
We are committed to providing high-quality content, staying up-to-date with the latest trends, and maintaining a balance between nutrition and flavor.
 Connect with HealthyBlog365 on Social Media
Join the HealthyBlog365 community on social media platforms to stay updated with our latest posts, watch exciting tutorials, and share your food stories with us:
 Facebook: Follow us here to stay updated with our latest posts and join our community.
 Instagram: Check us out here for inspiring visuals and ideas.
- Pinterest: Pin with us here to save creative ideas you’ll love.
 YouTube: Subscribe here for detailed tutorials and exciting videos.
 Thank You for Supporting HealthyBlog365!
We aim to build a connected community where everyone can share and learn from each other. If you have any questions or suggestions, don’t hesitate to reach out to us via social media or our website.
We hope you have a wonderful time on HealthyBlog365 and find new inspiration for your healthy culinary journey!

Honey Balsamic Brussels Sprouts
 Prep Time 10 minutes Cook Time 25 minutes Total Time 35 minutes
 Description
Ingredients
- 1 pound Brussels sprouts trimmed and halved
- 3 tablespoons honey preferably raw
- 2 tablespoons balsamic vinegar high-quality
- 2 tablespoons extra virgin olive oil
- 3 cloves garlic minced
- Salt and pepper to taste
Instructions
- Preheat your oven to 400°F (200°C).
- Rinse and trim the Brussels sprouts, cutting larger ones in half for even cooking.
- In a small bowl, whisk together honey and balsamic vinegar until smooth.
- In a large bowl, combine Brussels sprouts with minced garlic, olive oil, salt, pepper, and the honey-balsamic glaze. Toss until well coated.
- Spread the mixture onto a baking sheet in an even layer.
- Roast for 20-25 minutes until crispy and caramelized, tossing halfway through for even cooking.
- Serve warm and enjoy the rave reviews!