Sweet kernels meet rich garlic butter and gooey melted cheese to make this corn on the cob an irresistible side dish. This 30-minute recipe serves four people perfectly and will lift any meal, whether you’re hosting a summer barbecue or cooking a family dinner.
Our kitchen tests have found multiple ways to prepare this versatile dish. Traditional grilling works great, and modern air frying cuts the cooking time in half. The recipe’s inspiration comes from Mexican street corn (elote), which creates that perfect blend of sweet corn and salty cheese that makes everyone ask for seconds.
This detailed guide shows our tested techniques to select the best corn. You’ll learn how to make the perfect garlic butter sauce and achieve that ideal cheese melt that makes this dish truly special.
The Science Behind Perfect Corn on the Cob
The perfect corn on the cob isn’t just about luck – it’s pure science. Let me show you how understanding what happens inside those golden kernels will revolutionize your corn cooking skills.
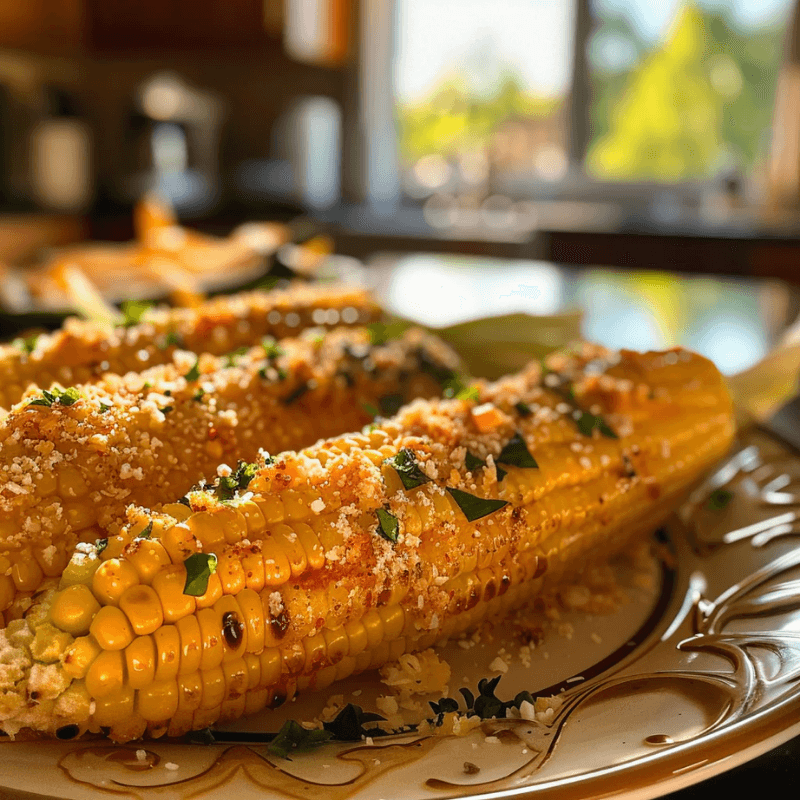
Golden, cheesy, and dripping with garlic butter – this Corn on the Cob is next-level delicious!
Why corn sweetness matters
Sweet corn’s magic comes from its genes, specifically the “sugary gene” that stops sugar from turning into starch as kernels develop. This genetic trait makes sweet corn taste nothing like the field corn used for animal feed or cornmeal.
Fresh corn naturally tastes amazing because it’s packed with sugar and has minimal starch. But this perfect state doesn’t last long. The moment corn is picked, its kernels start converting sugar to starch. This process happens faster in warm temperatures, which explains why corn at hot farm stands or grocery stores can lose its sweetness quickly.
Today’s sweet corn comes in several genetic varieties that affect how long the sweetness lasts:
- Standard (su) varieties: Classic sweet corn with great flavor but quick sugar-to-starch conversion
- Sugary enhanced (se) varieties: Sweeter corn that stays tender and creamy longer
- Supersweet (sh2) varieties: Contains the “shrunken” gene that keeps sugar around much longer
Modern corn hybrids are almost three times sweeter than old varieties, with nearly 35% sugar content. The corn also has proteins called prolamines that taste bitter as sugar levels drop, making sweetness preservation even more important.
How heat affects corn texture
Cooking corn requires balancing two processes that determine its final texture: starch gelatinization and pectin breakdown.
Corn’s starch molecules start absorbing water and gelatinizing at about 144°F, creating that smooth, silky texture we love. The pectin holding plant cells together begins dissolving at 176°F and breaks down faster at 194°F.
The ideal temperature for perfect corn texture lies between 150-170°F. This range gelatinizes starch without breaking down too much pectin. That’s why overcooked corn gets mushy – its cell walls collapse from too much dissolved pectin.
Corn plants grow best at 86°F (30°C), and their photosynthesis slows down in higher temperatures. Heat above 95°F can hurt developing corn by making it lose water faster and reduce photosynthesis, which affects how kernels develop and feel.
The role of fat in flavor development
Fat does more than make corn taste better – it changes how we taste flavors. Research shows fat plays a vital role in how we taste sweetness. Many of corn’s flavor compounds stay hidden without fat.
Adding butter to cooking water doesn’t help much. You’ll get much better results by spreading solid butter right on hot corn. Here’s why:
Butter creates an emulsion that helps fat-soluble flavors reach your taste buds. Fat also makes flavors stronger and last longer, creating a more complex taste experience.
Fat improves the whole eating experience through lubrication. The butter’s fat also helps hide any natural bitterness from corn’s prolamine proteins, especially in corn that isn’t super fresh.
Corn naturally contains healthy unsaturated fats in its germ that add subtle flavors. These natural fats work with added butter to create an amazing taste that makes well-prepared corn on the cob impossible to resist.
Understanding these three scientific principles – keeping sugar intact, applying the right heat, and using fat to carry flavor – will help you make the perfect Cheesy Garlic Butter Corn on the Cob.
Selecting and Preparing Your Corn
Your trip to making amazing Cheesy Garlic Butter Corn on the Cob starts way before you touch any butter or cheese. The sweetness, texture, and quality of your dish depends on how well you choose your corn at the market.
Crispy edges, melty cheese, and rich garlic butter – the ultimate summer side dish!
Identifying the freshest corn at the market
Picking perfect corn needs all your senses. The husk should be bright green, moist, and wrap tightly around the ear. You’ll know the corn is old if you see dry, brown, or loose husks.
Those thin strands at the tip (the silks) tell a different story. Brown silks are what you want! They should look tan to golden brown and feel slightly dry – not black or slimy. The silks turn brown right when the kernels reach their best state.
The “heft test” matters most. Fresh corn feels heavy because it’s full of moisture. A light cob means its sugars have started turning into starch.
Here are more tips to help you choose:
- Don’t peel back husks at the store – this hurts the corn and makes it lose sugar faster
- Gently squeeze the whole ear – it should feel firm everywhere
- Pick medium-sized ears since oversized ones can be tough and chewy
- A quick peek at the tip works if you must check kernel growth
Note that corn starts losing its sweetness right after harvest as natural sugars become starches. Modern hybrids keep their sweetness longer than older types, but fresh corn always tastes best in your Cheesy Garlic Butter recipe.
To husk or not to husk before cooking
The husks work as nature’s perfect wrapper. They keep moisture in and stop kernels from drying out. This protection becomes crucial when you can’t cook the corn right away.
Some cooking methods work better with husks on. To cite an instance, grilling corn in its husk creates steam that makes kernels tender and juicy while adding smoky flavor. Tests show that corn grilled this way scores a perfect 10/10 for taste and texture because husks protect kernels from intense heat.
Boiling corn is different – you can remove the husks first. For other methods, keep husks on until cooking time to maintain freshness.
Proper corn cleaning techniques
The best way to clean corn starts with removing husks, unless your recipe says otherwise. Here’s a quick way: cut the silky end, grab the tapered end with a kitchen towel, and pull hard – husks and silks often come off together.
Cool running water helps remove leftover silk strands. A damp cloth or paper towel works great for stubborn silks. Sharp knife comes in handy to cut away damaged tips.
Boiled corn needs complete cleaning. Grilled or oven-roasted corn needs different prep – pull back husks without removing them, take out silks, then fold husks back. This method protects your corn while letting you clean the parts you don’t eat.
Sweet, juicy corn creates the perfect base for your cheesy garlic butter topping. Good selection and preparation ensure every bite tastes amazing.
Chef-Approved Cooking Methods Compared
The cooking method you pick can make a huge difference in how your Cheesy Garlic Butter Corn on the Cob turns out. Let’s look at what each technique brings to the table.
Boiling: The quick classic approach
Boiling gives you tender, juicy corn fast. Here’s a chef’s secret – skip plain water and try the milk-butter method instead. Fill your pot halfway with water, bring it to a boil, add milk and a stick of butter. Let it simmer for 6-8 minutes. This method gives your corn a rich buttery taste that works great with cheesy garlic toppings.
Traditionalists might prefer corn boiled in heavily salted water that tastes like the ocean for 5 minutes. Salt brings out the corn’s flavor without making it salty. This straightforward approach needs no special equipment and leaves you with bright yellow, plump kernels.
Grilling: For smoky caramelized flavor
Taste tests give grilled corn a perfect 10/10 score for its smoky depth. You can grill it two ways: with husks on or off.
Keeping the husks on while grilling for 15-20 minutes over medium heat lets the corn steam naturally with a hint of smoke. Taking the husks off means 10-12 minutes of cooking time with frequent turns. This creates beautiful char marks and caramelizes the corn’s natural sweetness.
Brushing butter on naked corn while it grills locks in flavor. Those browned spots you get make the perfect base for cheesy toppings.
Oven roasting: The hands-off method
Oven roasting gives reliable results without much fuss. Wrap each shucked ear in foil with a tablespoon of herb butter. Place them on a baking sheet and roast at 425°F for 20-25 minutes, turning once halfway.
Steam builds up inside each foil packet, making the kernels extra moist. Roasting enhances corn’s sweetness without drying it out. This method works great for feeding crowds since the foil keeps everything hot until serving time.
Air fryer technique: The modern solution
Air fryers have changed how we cook corn with their speed and reliability. Brush some olive oil on your corn, lay the ears in a single layer, and cook at 370°F for 12-15 minutes. Remember to rotate them halfway through.
This new approach gives you those tasty caramelized spots like grilling but without needing a barbecue. Hot air circulates to create the perfect bite – tender yet with a slight crunch. Air fried corn stays juicy, making it an excellent base for your Cheesy Garlic Butter topping.
Creating the Ultimate Cheesy Garlic Butter
A buttery base turns simple corn into an amazing culinary treat. Once you’ve cooked your corn using any of the methods we covered earlier, you’ll want to create that perfect flavor combination that makes Cheesy Garlic Butter Corn on the Cob special.

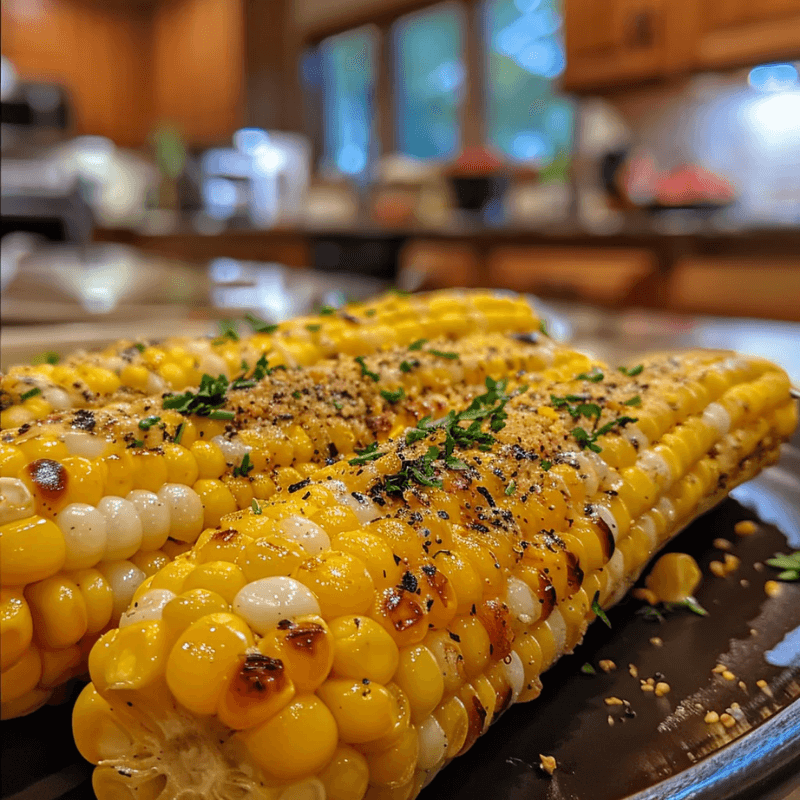
This Cheesy Garlic Butter Corn on the Cob is a flavor explosion in every bite!
Butter selection and temperature control
Unsalted butter serves as the perfect canvas for your flavor creation and lets you control the saltiness precisely. High-quality butter makes a clear difference in how your dish turns out. The chefs say butter at room temperature whips more easily and creates a light, spreadable texture that melts beautifully over hot corn.
The double-coating method will give you the most flavor: first spread a thin layer of plain butter on hot corn, then add your flavored butter mixture. This way, the corn soaks up all the delicious flavors.
Garlic preparation secrets
Fresh garlic gives you the best aromatic punch, though garlic powder works well if that’s what you have. The way you prep your garlic really changes its flavor. Using a microplane to zest fresh garlic works better than mincing – you’ll get a fine paste that mixes evenly into your butter without any harsh bits.
Want some roasted sweetness? Just sauté the garlic briefly in a tablespoon of butter before mixing it in.
Cheese options and melting properties
Traditional Mexican elote uses cotija cheese, but feta and queso fresco work great as alternatives. These crumbly cheeses add the perfect salty balance to sweet corn.
Finely grated parmesan melts exceptionally well and adds rich umami depth. The secret lies in grating it very finely – this helps it spread evenly and stick well to your buttered corn.
Balancing flavors with herbs and spices
Fresh herbs such as cilantro, parsley, and chives add brightness to the rich butter-cheese mix. A pinch of sugar might seem odd, but it actually brings out corn’s natural sweetness.
If you like heat, chipotle powder adds a smoky warmth that won’t overpower. The basic rule of flavor balance is simple: sweet cuts through bitter and sour, while salt makes most other flavors pop, especially sweetness.
Application Techniques for Maximum Flavor
Professional chefs know that becoming skilled at flavor application distinguishes good Cheesy Garlic Butter Corn on the Cob from exceptional ones. The right ingredients matter, but technique plays a crucial role.

Bold, buttery, and bursting with flavor – elevate your corn game with this cheesy garlic twist!
The double-coating method
A simple yet brilliant double-coating method produces incredibly flavorful results quickly. Start by spreading a thin layer of plain butter on hot corn and let it melt into the kernels. Next, add your flavored cheesy garlic butter mixture. This two-step process creates depth because the original butter layer creates pathways that allow the flavored butter to seep deeper between kernels.
Chefs’ tests show this method gives corn an amazing sweet and buttery flavor that packaged alternatives can’t match. The original coating works like a primer that helps the second layer stick properly instead of sliding off.
Timing your butter application
The final result depends heavily on butter application timing. Hot boiled corn needs butter right after it comes out of the water while steam rises. The corn’s heat helps butter spread evenly across the surface and settle between kernels.
Grilled corn needs butter midway through cooking. This gives aromatics and spices time to toast and develop deeper flavor complexity. Butter brushed during grilling keeps moisture locked in and prevents dry kernels.
Using heat to lock in flavors
Heat does more than cook – it seals in flavor. Hot corn creates a temperature difference that draws flavors deeper into kernels when butter touches it. The corn might need a quick return to heat after buttering.
Stovetop methods work best with reduced heat to medium after boiling. Let corn simmer in butter for 6-8 minutes. This gentle heat infuses flavor without overcooking. Grilled corn needs just 1-2 minutes over flame after butter brushing. This creates caramelization that turns ordinary corn extraordinary.
These precise application techniques turn regular Cheesy Garlic Butter Corn on the Cob into a chef-worthy dish with perfectly balanced flavor in every bite.
Conclusion
The secret to amazing Cheesy Garlic Butter Corn on the Cob lies in getting each step just right. Your choice of fresh corn, cooking method, and how you layer the flavors will make all the difference. Boiling the corn works well, but you might want to try grilling or air frying to add some exciting new flavors.
The science behind cooking corn is fascinating. When you know how sugar stays in the kernels, how heat works, and what fats do to enhance flavor, you’ll get better results every time. Don’t stick to just one method – try different approaches until you find what works best for you.
Quality ingredients are a great way to get the best results. You’ll taste the difference when you use fresh corn, good butter, and the right cheese. The double-coating technique will give a deep, rich flavor and spread the butter perfectly.
These chef-tested methods will help you make impressive corn on the cob for summer barbecues and family meals. Creating a memorable side dish from simple corn isn’t just about following a recipe – it’s about knowing the basics of perfect preparation that will reshape the scene of your dinner table.
 About HealthyBlog365
Welcome to HealthyBlog365, your go-to destination for all things food and drink. We believe that every meal is not just a way to nourish your body but also a meaningful connection with yourself and your loved ones.
HealthyBlog365 was created with a mission to inspire healthy living through nutritious meals and refreshing beverages. Here, you’ll discover a treasure trove of creative recipes, kitchen tips, and healthy eating trends tailored to fit modern lifestyles.
 What can you find on HealthyBlog365?
- Delicious and easy-to-make recipes: From simple meals for busy mornings to wholesome dinners for family gatherings, we’ve got you covered for every occasion.
- Nutritious drinks: Explore recipes for juices, smoothies, detox teas, and drinks that cleanse your body, boost your mood, and energize your day.
- Guides on eating habits: Get detailed insights into popular diets like keto, low-carb, and vegetarian-friendly meal plans.
- Kitchen hacks: Discover smart tips to save time, preserve food, and cook more efficiently.
We are committed to providing high-quality content, staying up-to-date with the latest trends, and maintaining a balance between nutrition and flavor.
 Connect with HealthyBlog365 on Social Media
Join the HealthyBlog365 community on social media platforms to stay updated with our latest posts, watch exciting tutorials, and share your food stories with us:
 Facebook: Follow us here to stay updated with our latest posts and join our community.
 Instagram: Check us out here for inspiring visuals and ideas.
- Pinterest: Pin with us here to save creative ideas you’ll love.
 YouTube: Subscribe here for detailed tutorials and exciting videos.
 Thank You for Supporting HealthyBlog365!
We aim to build a connected community where everyone can share and learn from each other. If you have any questions or suggestions, don’t hesitate to reach out to us via social media or our website.
We hope you have a wonderful time on HealthyBlog365 and find new inspiration for your healthy culinary journey!

Cheesy Garlic Butter Corn on the Cob
 Prep Time 10 minutes Cook Time 10 minutes Total Time 20 minutes
 Description
Ingredients
- 4 ears of fresh corn on the cob
- 1/2 cup unsalted butter
- 4 cloves garlic minced
- 1/2 cup freshly grated Parmesan cheese
- 2 tbsp chopped fresh parsley
- Salt and pepper to taste
Instructions
- Shuck the corn and remove silk strands; rinse under cool water.
- In a saucepan, melt unsalted butter over medium heat until bubbly; add minced garlic and sauté for 1 minute.
- Stir in grated Parmesan cheese until melted; season with salt, pepper, and chopped parsley.
- Brush the garlic butter mixture generously over each ear of corn.
- Grill or boil the corn for 7-10 minutes until tender yet crisp.
- Serve immediately, garnished with extra parsley and cheese if desired.