Banana pudding cheesecake cones combine two beloved desserts into one portable, party-perfect treat that looks impressive without the fuss. When I first discovered this no-bake dessert, I was amazed by how something so delicious could come together in just 20 minutes of prep time.
These delightful Banana Pudding Cheesecake Cones feature creamy cheesecake filling layered with nostalgic banana pudding, all nestled in crispy waffle cones. With a recipe that yields 12 servings, they’re perfect for summer gatherings where both kids and adults can enjoy them. In fact, their impressive presentation belies how simple they are to make – using straightforward ingredients like cream cheese, granulated sugar, and instant banana pudding mix.
We’ve found these treats to be incredibly versatile as well. For example, they can be customized with gluten-free options or enhanced with caramel or chocolate drizzle for added flavor. Even better, you can prepare components ahead of time and store them separately, making this an ideal dessert for busy hosts who want to wow their guests without spending hours in the kitchen.
What You Need to Make Banana Pudding Cheesecake Cones
Gathering the right ingredients makes all the difference in creating perfect banana pudding cheesecake cones. Let’s explore what you’ll need to make this delightful treat that combines creamy cheesecake with classic banana pudding flavors.
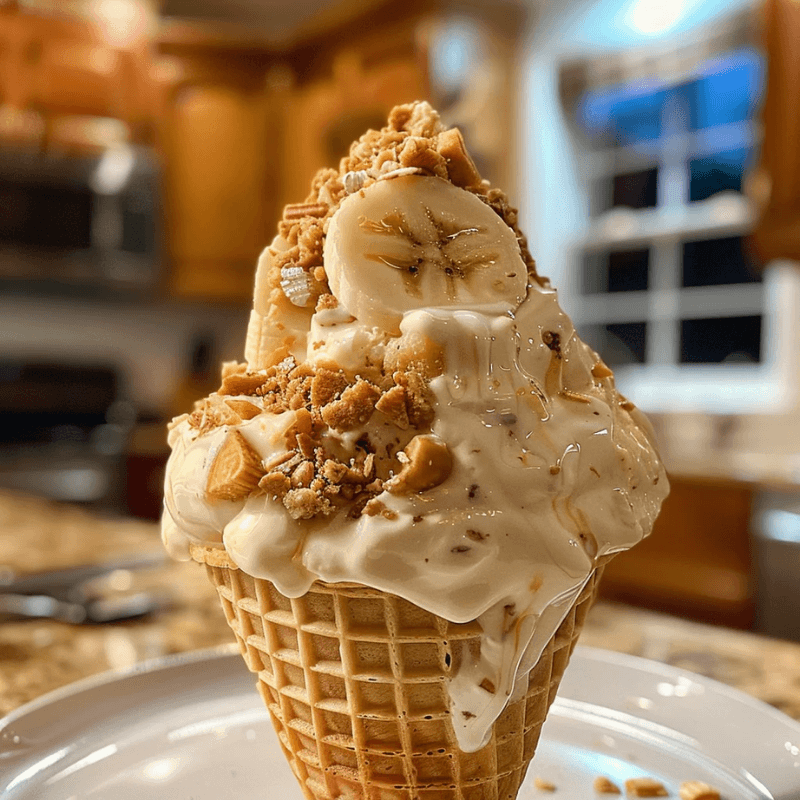
Banana Pudding Cheesecake Cones – The ultimate treat!
Essential ingredients for the filling
The heart of these dessert cones is the creamy filling. You’ll need 16 ounces of softened cream cheese as your base. To achieve that perfect sweetness, add 1 cup of granulated sugar and 1 teaspoon of vanilla extract for flavor depth. Additionally, 1 cup of sour cream provides the signature tanginess that makes cheesecake so irresistible.
For the banana pudding component, you’ll require 2 cups of whole milk and 1/4 cup of cornstarch to create the proper thickness. Don’t forget to include 1/2 cup of banana puree (made from about 2 ripe bananas) for authentic flavor. Furthermore, 1/2 cup of crushed vanilla wafers folded into the mixture adds a delightful textural contrast.
Choosing the right cones
The foundation of your dessert deserves careful consideration. You’ll need approximately 12 ice cream cones to hold your creamy concoction. Although waffle cones work exceptionally well due to their sturdiness and satisfying crunch, sugar cones are another excellent option.
When selecting cones, look for ones that feel fresh and crisp, as stale cones tend to get soggy much faster. Moreover, if you’re preparing these for a special occasion, consider chocolate waffle cones for an irresistible chocolate-banana combination.
Optional toppings and add-ins
Once you’ve mastered the basics, elevate your banana pudding cheesecake cones with these delicious extras:
- Whipped cream for a light, airy topping
- Extra crushed vanilla wafers for added crunch
- Fresh sliced bananas for garnish
- A drizzle of caramel sauce for extra indulgence
- Cinnamon (about 1/2 teaspoon) for warmth and depth
To accommodate dietary restrictions, many ingredients can be substituted. For a gluten-free version, simply use gluten-free cones and wafers instead of regular ones. Although the classic recipe is hard to beat, don’t be afraid to experiment with your favorite toppings to make these cones uniquely yours.
Step-by-Step: How to Make the Perfect Cones
Creating perfect banana pudding cheesecake cones requires organization and attention to detail. Let me walk you through the process step by step to ensure your dessert turns out beautifully every time.

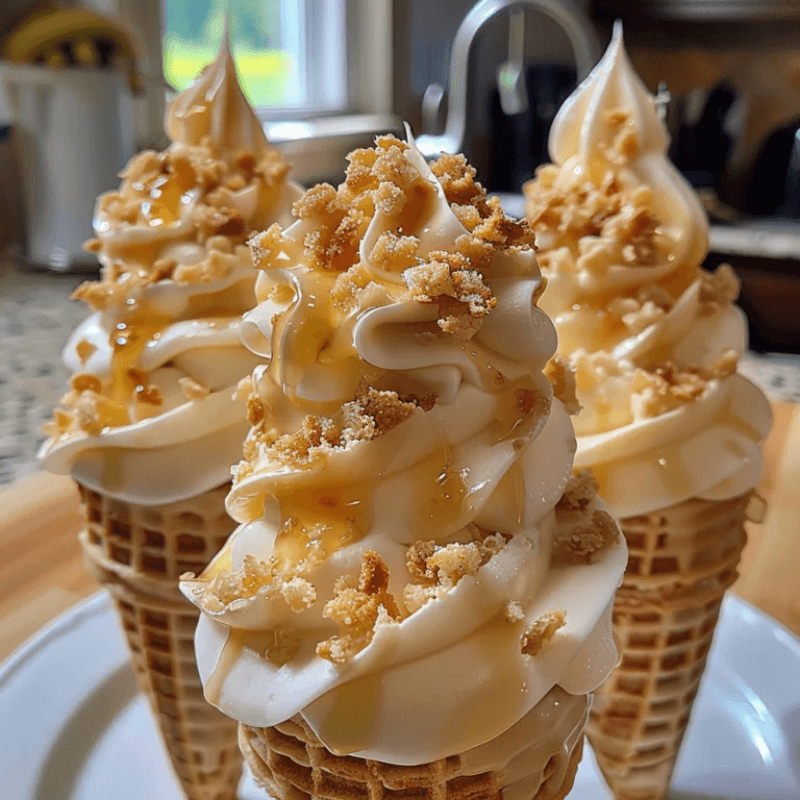
Creamy, crunchy Banana Pudding Cheesecake Cones!
1. Prep your ingredients and tools
Before diving into mixing, set up your workspace properly. Clear enough counter space for an assembly line with your cones standing in glasses or a specialized cone holder. Soften your cream cheese by leaving it at room temperature for 30 minutes. This softening step is crucial—cold cream cheese will create lumps that can’t be fixed later. Additionally, gather all components before starting, as this isn’t a recipe you can pause halfway through. For bananas, ensure they’re fully ripe for the best flavor—if needed, place them in a paper bag to speed ripening.
2. Make the cheesecake filling
Begin by beating the softened cream cheese until completely smooth—this might take longer than expected. Using a hand mixer, blend until silky with no lumps. Subsequently, add your powdered sugar gradually while continuing to beat. Mix in the vanilla extract for flavor depth. In a separate bowl, whip the heavy cream until it forms stiff peaks—you’ll know it’s ready when you pull the beater out and the cream stands up with just a slight curl at the tip. Finally, use a rubber spatula to gently fold the whipped cream into your cream cheese mixture with a down-and-over motion to preserve as much air as possible.
3. Prepare the banana pudding layer
Vigorously whisk the pudding mix and cold milk together until well combined. Though easier with a hand mixer, you can do this manually with effort. Once mixed, let it sit for exactly five minutes—set a timer! The pudding should be thick yet still pourable. Be careful not to let it set too long, or it becomes too firm to pipe into the cones.
4. Assemble the cones
Start with a spoonful of crushed vanilla wafers in the bottom of each cone to create a barrier against sogginess. Transfer your cheesecake mixture and pudding to separate piping bags for easier handling. Begin layering by piping a small amount of cheesecake mixture, followed by pudding, then sprinkle with crushed wafers. Repeat until cones are filled to the top, gently tapping them occasionally to settle the filling.
5. Add toppings and chill
Finish with fresh banana slices arranged on top of the final layer. For extra indulgence, add a dollop of whipped cream and additional crushed vanilla wafers. Refrigerate the assembled cones for at least one hour to help the layers firm up. For best results, serve within 2 hours of assembly to maintain the cone’s crispness.
Tips to Customize and Elevate Your Cones
One of the joys of making banana pudding cheesecake cones is how easily they can be customized to suit any occasion or dietary need. I’ve discovered countless ways to make these sweet treats even more special with just a few simple tweaks.

These Banana Pudding Cheesecake Cones are next-level dessert!
Flavor variations to try
The basic banana pudding cheesecake filling is just the beginning. Indeed, you can create exciting flavor combinations by folding crushed nuts like almonds, pecans, or pistachios into the cheesecake mixture for a delightful crunch. Chocolate lovers might appreciate mixing in chocolate chips or chunks for a double chocolate experience. Similarly, a caramel swirl drizzled into the cheesecake mixture creates a gooey surprise that pairs perfectly with banana flavors.
For seasonal flair, try adding a sprinkle of cinnamon or nutmeg to the filling. These warm spices add depth, making the dessert perfect for fall gatherings. Throughout the summer months, consider adding fresh fruits alongside the bananas – strawberries, raspberries, or even pineapple create a tropical twist that brightens the flavor profile.
Gluten-free and allergy-friendly swaps
Making these cones accessible to everyone is simpler than you might think. Joy brand sugar cones are gluten-free and free from seven of the top eight allergens (containing only soy). Essentially, the only adaptation needed is swapping regular waffle cones and vanilla wafers for gluten-free versions.
For egg-free preparations, several substitutes work well, including JUST Eggs, chia eggs, or flax eggs. Consequently, these simple swaps make the dessert suitable for most dietary restrictions without sacrificing taste or texture.
Creative presentation ideas
Presentation elevates these treats from simple desserts to showstoppers. Consider dipping the cone rims in melted white chocolate and then into colorful sprinkles – particularly appealing for children’s parties. Alternatively, arrange them in decorative cone holders or a specialized cone stand to prevent tipping.
Freeze the filled cones for a refreshing twist on hot days – they become cheesecake popsicles! Or transform the concept entirely by using waffle bowls instead of cones for a sit-down dessert experience.
To seal any holes in the bottom of cones, drop in a mini marshmallow or chocolate chip – this prevents leaks and adds an extra sweet surprise at the end.
Serving, Storing, and Making Ahead
The secret to serving perfect banana pudding cheesecake cones lies in timing and preparation. These delightful treats require some planning to ensure they remain crisp and delicious when it’s time to enjoy them.
Easy to make, fun to eat – Banana Pudding Cheesecake Cones!
How to keep cones from getting soggy
The biggest challenge with filled cones is maintaining their crispy texture. To create a moisture barrier, brush the inside of each cone with melted white chocolate and allow it to harden completely. This creates a waterproof layer that prevents the filling from seeping through. As another option, place a small amount of crushed vanilla wafers at the bottom of each cone to absorb excess moisture.
A clever hack involves placing a mini marshmallow at the bottom tip of the cone—this acts like a cork to prevent drips and helps maintain structure. According to food experts, pre-freezing the empty cones for about 30 minutes before filling can also slow moisture absorption.
Make-ahead tips for parties
For stress-free entertaining, prepare components separately ahead of time:
- Mix the cheesecake filling up to 24 hours in advance and store in an airtight container in the refrigerator
- Prepare pudding components separately and refrigerate
- Keep crushed wafers in a zip-top bag at room temperature
- Slice bananas just before assembly, adding a splash of lemon juice to prevent browning
Given that assembled cones are best within 4 hours, consider setting up a “cone bar” where guests can build their own desserts. This interactive approach not only solves the soggy cone problem but also creates a fun activity during your gathering.
Storage instructions for leftovers
Despite your best efforts, you may have leftover cones. Store them in the refrigerator for up to 24-48 hours in an airtight container. Nevertheless, be aware that even with a chocolate barrier, the cones will gradually soften over time.
The cheesecake filling itself keeps well—about 3 days refrigerated in an airtight container. Surprisingly, you can freeze the filling for future use, but never freeze assembled cones as they’ll become unpleasantly soggy upon thawing.
For optimal freshness, store cones in a cool, dry place with a slice of bread in the container—the bread will absorb excess moisture and help the cones stay crisp longer.
Conclusion
Banana pudding cheesecake cones truly represent the perfect fusion of classic desserts in a portable, party-ready package. Throughout this guide, we’ve explored how these delightful treats combine creamy cheesecake with nostalgic banana pudding flavors, all nestled in crispy waffle cones. Most importantly, they require just 20 minutes of prep time while still delivering impressive results. The versatility of these cones stands out as one of their greatest strengths. Whether you prefer adding caramel drizzles, chocolate chips, or seasonal spices, these treats adapt effortlessly to your creativity.
Additionally, the make-ahead possibilities make these cones perfect for busy hosts. Preparing components separately allows you to assemble them just before serving, consequently maintaining that essential crispy texture. The gluten-free and allergy-friendly options ensure everyone at your gathering can enjoy these sweet creations without compromise.
Last but certainly not least, the presentation opportunities add another dimension to these desserts. From colorful sprinkles on chocolate-dipped rims to creative serving stands, these cones transform from simple treats to eye-catching centerpieces. The next time you need a dessert that balances impressive presentation with practical preparation, these banana pudding cheesecake cones will undoubtedly become your go-to recipe. Your guests will never guess how easily these delectable treats came together!
About HealthyBlog365
Welcome to HealthyBlog365, your go-to destination for all things food and drink. We believe that every meal is not just a way to nourish your body but also a meaningful connection with yourself and your loved ones.
HealthyBlog365 was created with a mission to inspire healthy living through nutritious meals and refreshing beverages. Here, you’ll discover a treasure trove of creative recipes, kitchen tips, and healthy eating trends tailored to fit modern lifestyles.
 What can you find on HealthyBlog365?
- Delicious and easy-to-make recipes: From simple meals for busy mornings to wholesome dinners for family gatherings, we’ve got you covered for every occasion.
- Nutritious drinks: Explore recipes for juices, smoothies, detox teas, and drinks that cleanse your body, boost your mood, and energize your day.
- Guides on eating habits: Get detailed insights into popular diets like keto, low-carb, and vegetarian-friendly meal plans.
- Kitchen hacks: Discover smart tips to save time, preserve food, and cook more efficiently.
We are committed to providing high-quality content, staying up-to-date with the latest trends, and maintaining a balance between nutrition and flavor.
 Connect with HealthyBlog365 on Social Media
Join the HealthyBlog365 community on social media platforms to stay updated with our latest posts, watch exciting tutorials, and share your food stories with us:
 Facebook: Follow us here to stay updated with our latest posts and join our community.
 Instagram: Check us out here for inspiring visuals and ideas.
 Pinterest: Pin with us here to save creative ideas you’ll love.
 YouTube: Subscribe here for detailed tutorials and exciting videos.
 Thank You for Supporting HealthyBlog365!
We aim to build a connected community where everyone can share and learn from each other. If you have any questions or suggestions, don’t hesitate to reach out to us via social media or our website.
We hope you have a wonderful time on HealthyBlog365 and find new inspiration for your healthy culinary journey!